Top 10 Tips To Prepare Your House For Move-In Day

When relocating, there is a lot to think about. The inability to settle in ultimately isn’t just due to the massive task of unpacking all your moving boxes from the moving truck. Getting to know your home, understand its systems, and prioritise the projects you want to tackle when you become a homeowner is essential.

Doing everything right the first time is preferable to waiting and hoping you’ll figure it out later. There is no denying that you and your family member have a lot in your life right now.

We’ve put together a list of the ten most important things you need to do before moving into a new home to help you get your priorities straight and keep moving costs at a minimum.

Start With a Plan

When moving house, the best time to do a thorough walk-through of your destination room is when it is empty. Look around and make sure there are no last-minute issues in the new space:

  • Ensure the previous owner completed all requested and agreed-upon repairs before buying a home.
  • The house has everything that was supposed to be included in the sale.
  • Outlets, switches, fixtures, doors, and windows are fully functional and ready for use.
  • The seller left behind all warranties and maintenance manuals in their old house.
  • Pests, dirt, and debris have been removed from the property.
  • The grass appears to be in fair condition.
  • You’ll be able to fit all of your furniture. through the narrow streets and the front door.

Call your realtor immediately if you discover something violating the terms of the sale agreement, such as the previous owner taking the washer and dryer with them when they were supposed to stay. You’re on the hook for any issues that weren’t covered in your contract.

Pack an Overnight Bag

Even if you’re moving locally for just a few miles away, there’s always the possibility that something could go wrong on moving day. If you signed up for a full service move with a moving company, it means that they will take care of all your belongings. Thy will most likely bring in the packing materials like packing tape, cardboard boxes, bubble wrap and more as they prepare to store all your belongings inside all the boxes. So, be sure you have your important documents and an overnight bag ready before the movers arrive:

Have everything you’ll need for at least 24 hours, including:

  • Toiletries, especially toilet paper rolls
  • A change of clothes
  • Your favourite coffee mug and tea bags in an essentials box
  • Snacks and drinks and some paper plates and utensils so you can eat properly
  • Laptop and charger
  • Medication in plastic bags or plastic tubs
  • Sheets and a pillow, a couple of stuffed animals for your children
  • A first-aid kit
  • Important personal and financial documents
  • Medical records and all the details of your medical condition, if any
  • Your moving paperwork and to do list for moving day

Notify the Proper Authorities

You’ll need to contact a few different people and businesses to let them know you’re moving. You can start informing them after you have booked a removal company and professional packers

Here’s a list of who to notify and when:

  • The post office – Give them your new address at least a week before moving.
  • Your employer – They’ll need to update your payroll information.
  • Your bank – You’ll want to transfer your accounts and cancel automatic payments for your old address.
  • The utility companies – Arrange to have the power, water, and gas turned on at your new home a day or two before moving in. Make sure your security deposit is in place so you have funds to cover bills after the final cut off.
  • Your insurance companies – You’ll need to update your new address with your auto, life, and homeowners (or renters) insurance policies. They can forward your bills, receipts and updates

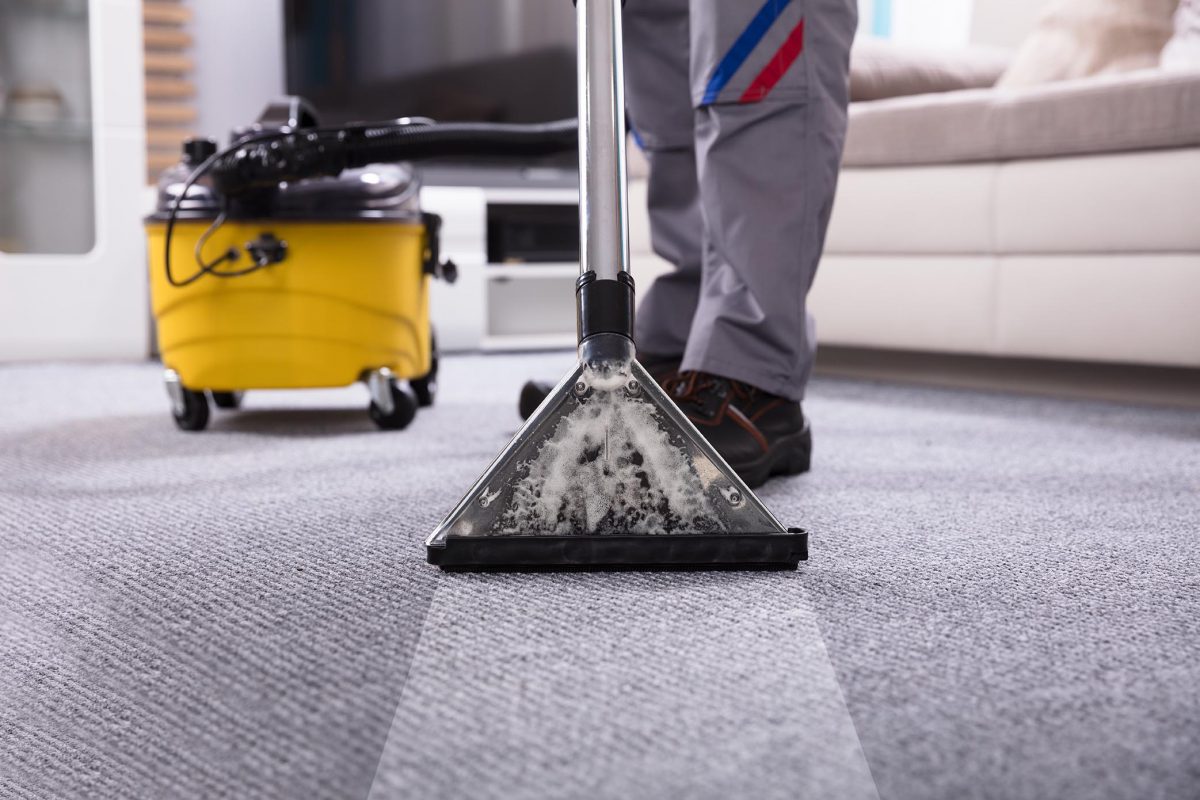
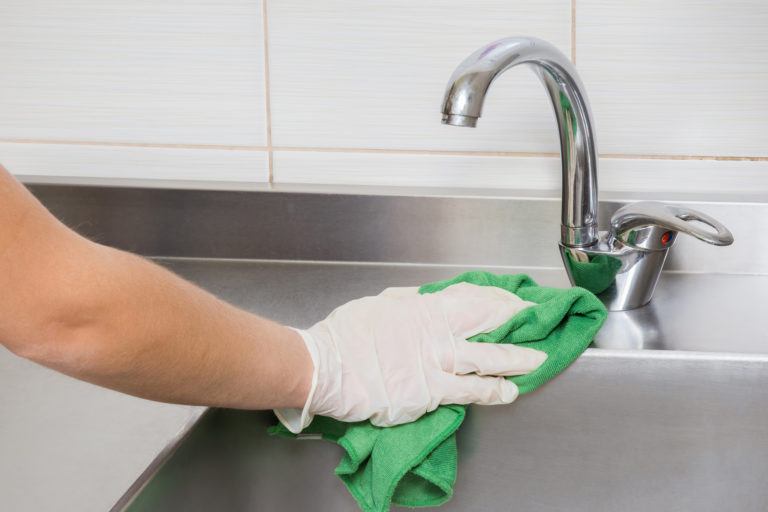
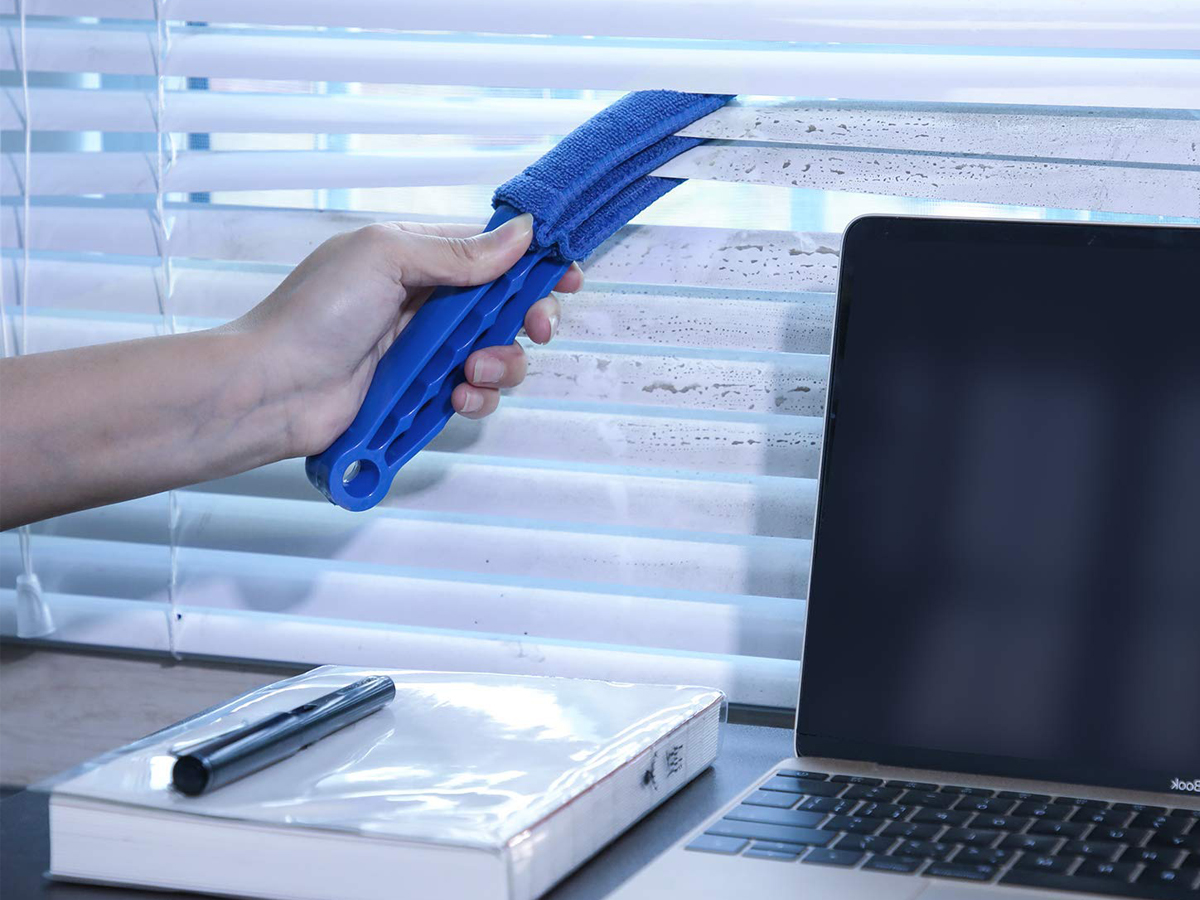
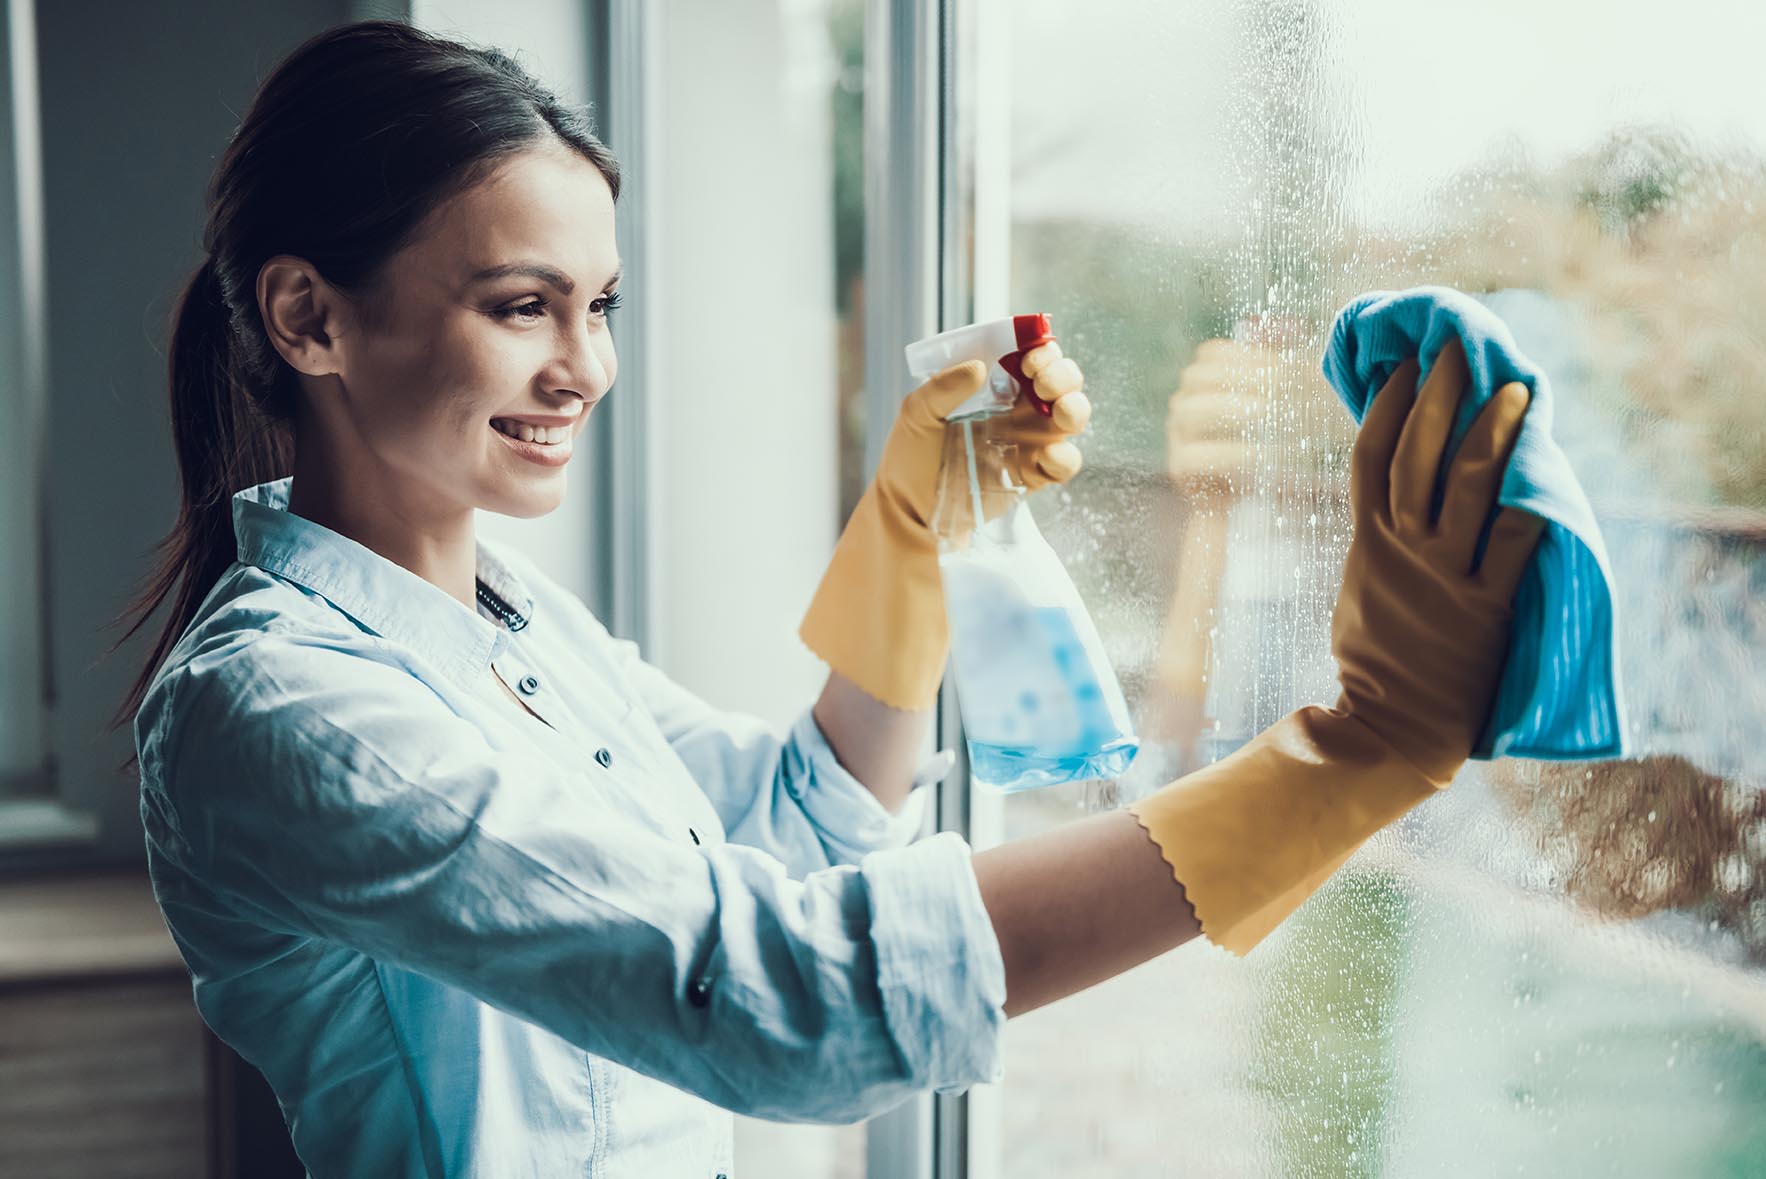
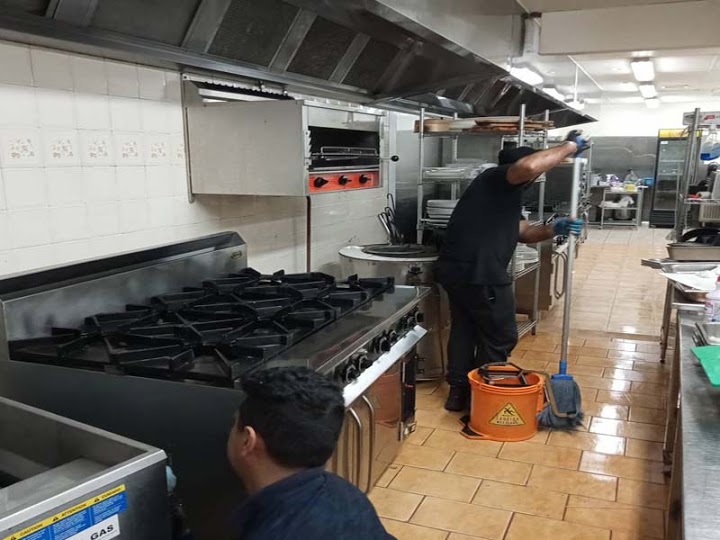
Clean the House from Top to Bottom

Even if you’re hiring professional cleaners, giving your new home a thorough cleaning before you move in is always a good idea. This way, you can start fresh and ensure everything is clean and comfortable for you and your family in the new space. Do a deep clean in the kitchen, bathrooms, living room, and other common areas. Be sure to wash all the windows, inside and out for your upcoming move.

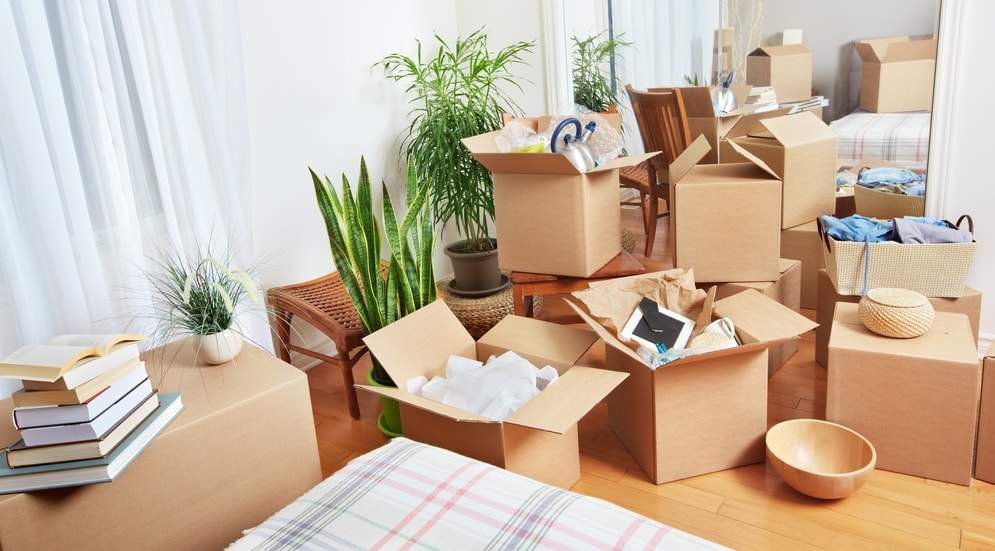
Protect Your Belongings During the Moving Process

Take extra care when packing your belongings to prevent any damage to them during the move. For items that are easily broken, use bubble wrap or packing peanuts. Smaller boxes that are easier to carry when transporting heavy items are preferable. To prevent the contents of the box from moving around while it is being moved, fill any empty spaces with crumpled-up pieces of newspaper.

Make a Floor Plan

Feeling overwhelmed when you walk into your brand-new house for the first time, trying to figure out where you should be hanging clothes when the movers arrive and so on.

Therefore, before moving house, set aside some time to draw up a floor plan. This will make it much easier for you and the moving company to visualize where each piece of furniture will go, which will, in turn, make the process of unpacking much simpler.

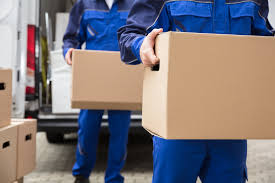
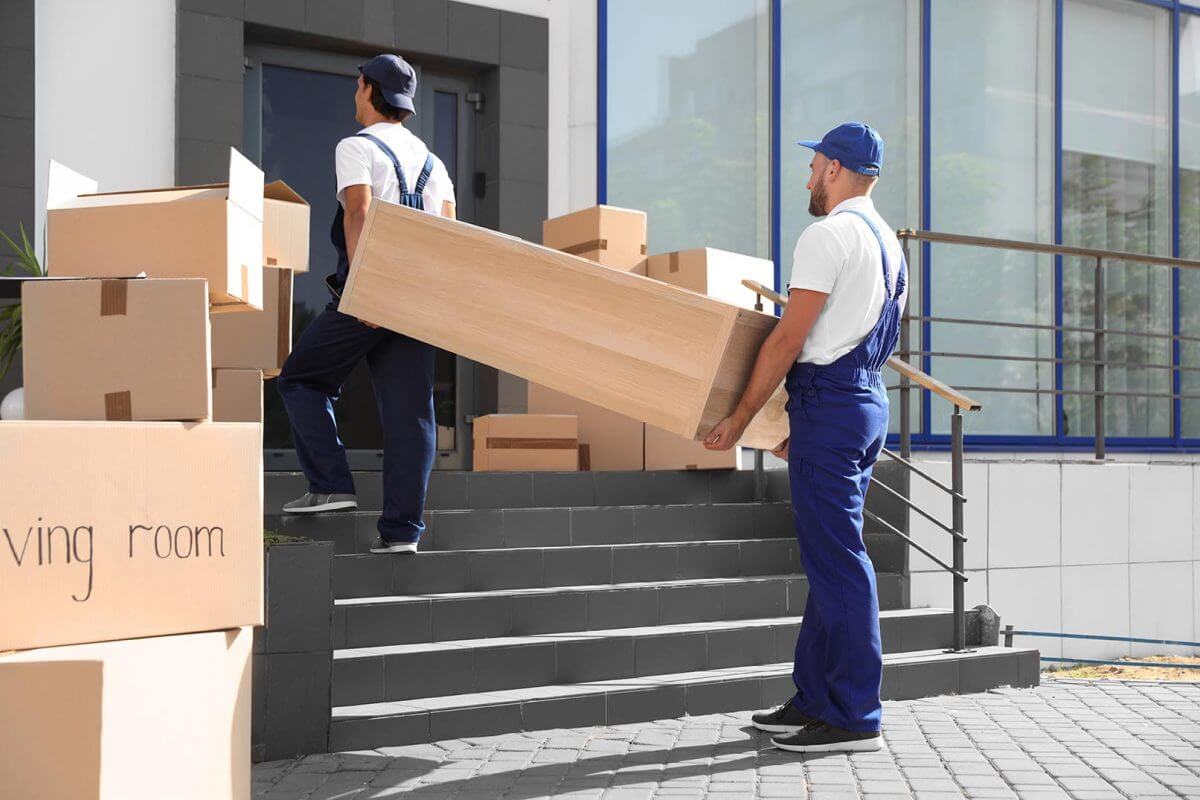
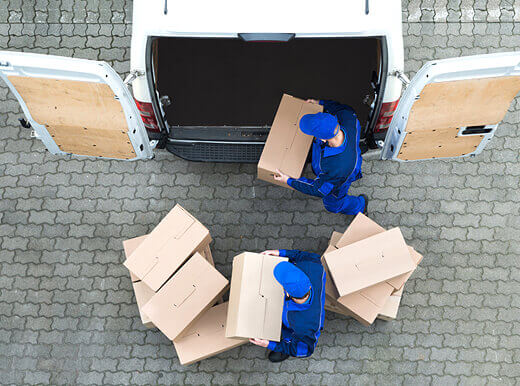
Rent a Moving Truck for Your Moving Boxes

You will need to rent a moving truck if you plan on doing the heavy lifting and manual labour associated with a DIY move. Be sure to make the reservation for the moving truck at least a week in advance to ensure that you get the size you require. Make sure the moving truck is packed carefully and evenly to prevent any damage from occurring while it is transported.

However, if you want a fast and stress-free moving process, you can hire a moving company or moving companies that can pack items and make moving day a bit easier by providing you with a complete list of things you need to prepare for moving day.

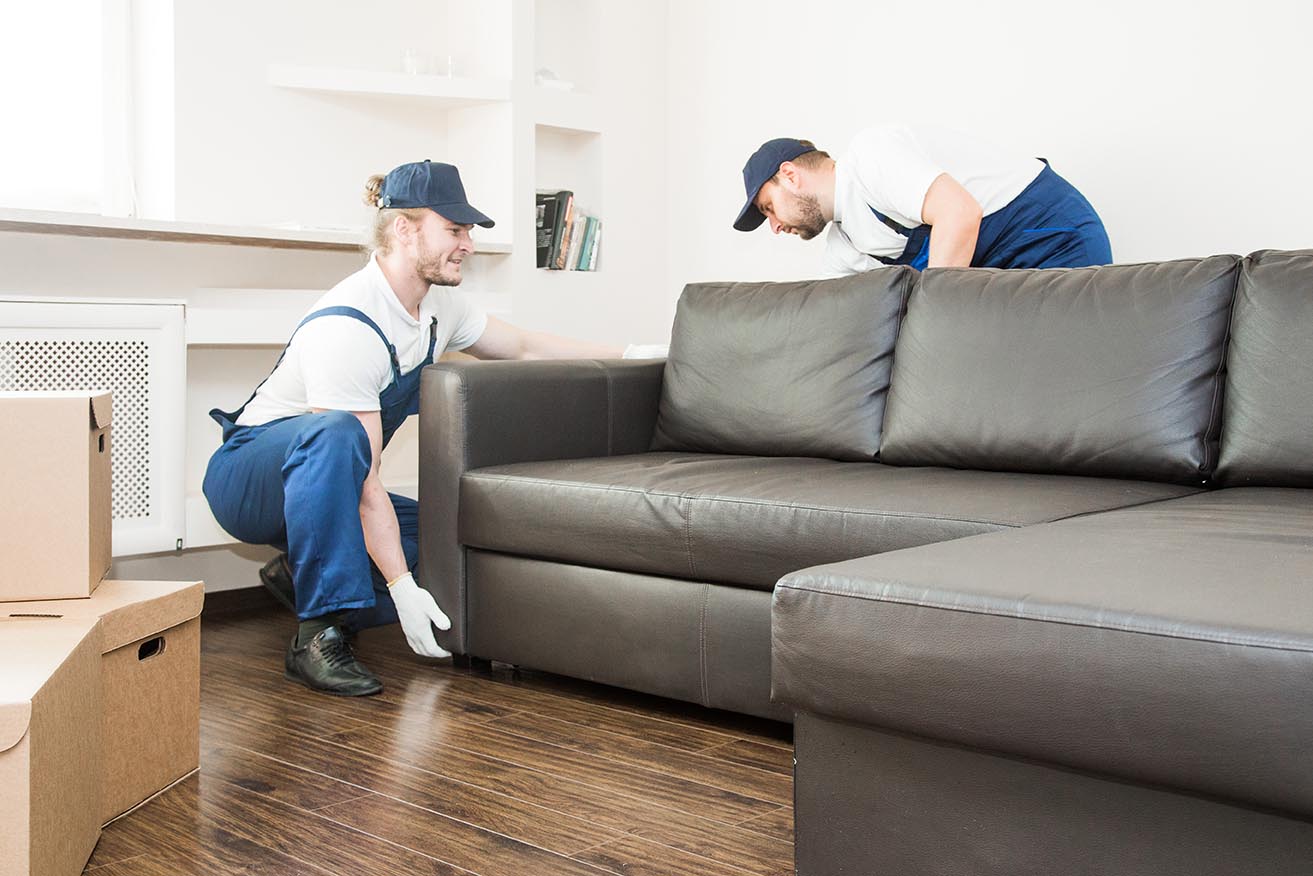
Hire a Moving Company

You always have the option to hire professional movers if you would rather not deal with the hassle of packing up everything on your own and moving it all by yourself. Moving companies will do all of the heavy liftings for you, and they will deliver your belongings to your new house in a secure manner. Before settling on one option, it is highly recommended that you first obtain several price estimates from moving service providers. You can ask for a quote depending on your needs and move date.

Change the Locks

When you move into a new house, one of the first things you should do is change the locks on all doors. Your family will be safer and more secure in their new home due to this measure. You have the option of changing the locks on your own, or you can hire a qualified expert to do it for you.

Get to Know Your New Neighbourhood

After some time to get settled into your new home, you should discover the neighbourhood. Learn the names of the local establishments, and introduce yourself to your new neighbours. This is an excellent method for ensuring that you feel at ease and secure in the first few days in your new residence.

Conclusion

These are just a few moving tips to help you prepare for move-in day. By following these simple steps, you can ensure that everything goes smoothly and that your new home is clean, comfortable, and safe for you and your family, especially children and pets.

5 “Red Flags” You Should Watch Out for When Hiring a Removalist

Hiring a professional removalist company is a great way to take the stress out of your next move. But how can you tell if moving companies are reputable and will provide a good service?

It is essential to do your research before hiring a removalist service to avoid any potential issues. Here are five “warning signs” that you need to keep an eye out for if you want the right removalist company as your service provider:

1. A Lack of Communication

When searching for a removalist business, one of the essential qualities to look for is one that is good at communicating. If removal companies are difficult to contact or does not respond to your questions, likely, they will not respond to your needs when it comes to your move. Before hiring the company, it is vital to ensure you get everything in writing and confirm everything with them.

2. The Lack of Insurance

Checking to see if the company has an insurance policy is another significant factor to consider. An insurance policy is essential if an unforeseen event disrupts the move and your belongings sustain damage from the moving services. You must inquire about insurance coverage and obtain confirmation of it in writing before moving interstate.

3. Lack of professionalism

It would be best if you made sure that the moving company you hire is professional when you are looking for someone to assist you with your move. This indicates that they should arrive promptly, maintain a positive attitude, and be respectful of your property at all times. Likely, the company will not do an excellent job with your move if they present themselves in an unprofessional manner and do not have a professional demeanor.

4. Hidden Fees

Make it a point to inquire about fees upfront to avoid unpleasant surprises later on. Be sure to ask ahead of time about any potential hidden costs that may be incurred, as other removalists may charge for things like fuel or taking the stairs, or the use of packing materials and all the boxes you use up. Asking for an accurate estimate and payment terms can help you hire the best movers for your needs.

5. Poor Reviews

Before hiring a business, you should conduct research and carefully read any reviews posted online. If the majority of the reviews for a company are critical, it’s probably not the best option to go with that particular business.

If you are aware of these warning signs, you can steer clear of potential issues when hiring a removalist. To ensure that you are receiving the highest possible level of service, it is vital to conduct thorough research and pose many questions.

How to Find the Best Removalists in Town?

There is no shortage of removalists available, but it can be challenging to locate the most suitable service for your requirements. The following is a list of some advice that can be used to find the most reliable removalists in the area:

1. Get recommendations from friends or family.

Word of mouth is the most reliable source of information when looking for a good removalist. If you want to find a good removalist in the area, you should ask your family and friends for recommendations.

2. Do some research online.

Researching the internet is another fantastic method for locating a reliable removalist. You can find out what other people think about various removalists in your area by reading reviews on review websites and participating in online forums.

3. Ask around for quotes from moving companies.

After you have determined which options are most suitable, it is time to begin shopping around for prices. Since removalists typically charge by the hour, it is vital to decide how long they anticipate the job will take and factor that into your budget.

4. Make sure they’re insured.

When searching for a removalist, this is one of the essential characteristics to look for. Be sure they are covered by insurance if anything goes wrong while moving.

5. Get everything in writing.

Ensure that everything is documented and written before hiring a removalist. This includes the prices they charge, the services they provide, and their insurance protection.

6. Check the Better Business Bureau.

Check with the Better Business Bureau if you are still unsure which removalist to hire if you are still uncertain. This will give you an idea of how long the company has been in business and whether there have been any complaints lodged against them.

7. Identify the removalist service you need

After selecting a company to work with, you must investigate the kinds of products and services the company provides. It’s possible that some businesses only offer the most basic services, while others provide a comprehensive menu of options. The scope of your relocation and the required travelling distance will play a role in determining which benefits the company can provide for you.

8. Make sure you are comfortable with the company

It is essential that you can relax with the removalist company that you pick. Before settling on a conclusion, it is crucial to ensure that you have all of the necessary information and that you have satisfied all your questions.

9. Make sure you are familiar with the policies of the removalist company

Before you agree to use the company’s services, you should thoroughly examine your knowledge of its policies to grasp their meaning. These policies will cover topics such as their refund and cancellation policies and their payment and insurance coverage policies.

10. Compare Removalist Companies

After you have collected all of this information, you will be able to evaluate various removalist companies to determine which one is the most suitable for meeting your requirements. Before making your final choice, it is important to thoroughly compare their prices, services, terms of service, and customer reviews.

These are just a few suggestions to help you locate the most qualified removalists in the area. If you follow these guidelines, you can be confident that you will identify an established and dependable moving company to assist you with your move.

7 Tips to Keep Your Home Organised When Moving

Many people find moving to a new house extremely stressful, more so when they have to go through the process of getting everything organised again. But you can keep your home in order, even during a big move, just by following these seven essential tips:

Book a Removalist Service Way Ahead of Time.

Instead of putting off this task until the last minute, it’s best to book your removalist well in advance. This will give you enough time to declutter your home and get everything else organised for the move. Not to mention, it’ll also take a lot of stress off your plate come moving day.

Hire a professional team who will help and guide you. If you don’t have a lot of experience with moving, then it may be good to hire professional packers who can help you with everything. For example, the moving company can come in and pack all your belongings before the big day so that there’s one less thing for you to worry about.

Additionally, moving services can take care of disassembling your furniture, unpacking your belongings, and setting everything up again in the new place. You can choose from a wide range of services when you hire a professional removal company, so it’ll be great to find a removalist company that offers everything you need, including the moving truck.

Once you have that dealt with moving services and have that squared away, you can move on to the next steps. There are a lot of things to do and prepare for in the days leading to moving day. It’s best to have each family member involved in the process of moving house.

Make a Detailed Checklist for the Moving Process

When it comes to moving house, organisation is key. One of the best ways to stay organised is by making a detailed checklist for the upcoming move. This way, you won’t forget anything, right down tot he zip lock bag and toilet paper, and you’ll know what to do and when.

Not only that, but you can use this list to keep track of your progress. For instance, you can tick off each task as you complete it so that you don’t have to constantly go back and forth between different tasks.

A checklist will also come in handy on moving day, as you can use it to make sure that everything is in its rightful place before the moving service arrives. You can give clear instructions to the moving company based on the items on your checklist.

First, Declutter, Then Pack Your Moving Boxes.

Once you’ve had enough time to sort through all your belongings in the entire house, it’s time to start packing. Decluttering your current house is essential before you can even begin to pack, as it will make the whole process of moving house much more organised and streamlined. Not to mention, you will save money with these few tips and do a fantastic job of moving.

While you may be tempted to just start throwing things into boxes without thinking too much about it, this will only make things more difficult and chaotic in the long run. So, take your time to sort through everything and get rid of anything you don’t need or use anymore.

This includes clothing you no longer wear, books you’ve already read, outdated furniture, and anything else you don’t need like old coffee mugs and collectible items.

Also, make sure that you pack your belongings with care so that they won’t get damaged during the move. This is especially important for things like dishes and antiques, which are usually more fragile and delicate. Therefore, make sure you use plenty of bubble wrap, plastic tubs, and other protective packing materials that will help as you pack things when moving house.

Pack All the Boxes According to Room.

It is easier to keep everything in its place if you take one thing at a time and arrange it in well-labelled containers. It is best to pack your belongings according to the room where they belong or will be used and then start labelling boxes.

For instance, you can label boxes as living room, kitchen, bedroom, linen closet, etc. Once done, you may place them all in one corner of your home. This will also be helpful to the movers as they can more easily identify the boxes that need to be taken out first and sent directly to their final destination.

Additionally, you can also write a list of each room’s contents in order to avoid any confusion and mix-ups. This way, you won’t have trouble finding specific things later on when unpacking everything at your new place. You can add where your son’s favourite toys are, where the pet essentials are, and also where you placed all the important documents as you pack items.

Use Boxes and Bins of Different Sizes.

When packing your belongings, you should also think about using boxes and bins of different sizes. This will come in handy when trying to fit everything into your new place, as some items may be too big or bulky for certain areas.

For instance, you can use smaller boxes for books and clothes, while larger ones can be used for things like lamps and vases. Additionally, you may also want to use bins or baskets for any loose items that won’t fit well into boxes.

This will also make unpacking much easier as you won’t have to search through many different boxes for one specific item. Instead, you can just grab the bin or basket you need and go from there.

Use Color-Coding as a Packing Strategy.

A great way to keep everything organised when packing is using colour-coding as a strategy. This involves using different coloured labels or stickers on your boxes so that you can easily sort them out later on.

For instance, you can use coloured tape or stickers to mark boxes according to the room where they belong. This will make it much easier for you or other family members when unpacking as they can just grab a box and place all of its contents in their respective places.

Another way that colour-coding can be helpful is by using different colours to represent different family members. This is especially useful if you have kids, as they can be responsible for their colour-coded belongings.

There will be no confusion about who owns what and where everything should go. Plus, it’s a great way to teach kids about organisation and responsibility from a young age.

Create a “First-Night” Box

Consider the non-essentials you’ll need on your first night in your new home and pack them in a box. This “first-night” box should include items like toiletries, pyjamas, a change of clothes, towels, sheets, pillows, snacks, drinks, and anything else that you or your family might need.

This way, you won’t have to go through all of your boxes to find these things when you first arrive, which can be quite stressful. Instead, you just have to bring your first-night box with you, and you will be good to go!

Settling Into Your New House

The challenge isn’t over after you’ve shipped all of your belongings to your new house. Once there, you have to contend with the daunting task of organising your new house. It will be challenging if you have so much stuff to sort through, so hopefully you have packed and labelled the items you have brought on moving day.

Clean Before You Move In

It may be difficult to do this when you’re already exhausted from all that moving, but cleaning before you move into your new house will make it easier to arrange everything in an organised manner. This will also allow you to get a feel of the space and develop a game plan on how to utilise it efficiently.

Have a Floor Plan

You don’t need to be an architect to create a floor plan, but having some kind of blueprint will make it easier to decide where to put your furniture. Once you have a plan, stick to it as much as possible so you don’t have a cluttered home.

Give Your Home a Fresh Start

Don’t be tempted to use the same colour palette and arrangement you had in your old place. Make your new home feels like something exciting and fresh by choosing different colours, textures, patterns, and even furniture.

Keep Things Out of Sight

Instead of taking extra time to arrange everything properly, keep some things out of sight by installing cabinets, shelving, and organisers. You can choose from various options such as shoe racks and closet organisers that will help you keep things in order.

Create that ‘Home Sweet Home’ Feeling

While maintaining order is important, don’t forget to make your new home feel like a comforting haven for your family. Add personal touches such as family photos, artwork, plants, and other decorative pieces to make it more welcoming.

Make the Most Out of Storage Areas

Don’t you have a lot of storage space in your new home? That’s okay because there are different ways you can utilise every nook and cranny for extra storage, and this includes under staircases and on top of cabinets.

Living in a cluttered home is stressful. If you want to make your life easier, organise and declutter your new place as quickly as possible after moving in. With these helpful tips at hand, you’ll be able to keep things organised so you can begin enjoying your new home!

Tips for Choosing a Good Removalist Company

Interstate removalists are professional companies that specialise in moving household goods and other items from one state to another. A removals company is usually hired when people are moving house, although they can also be used for other purposes such as business relocation or holiday transport.

The best removalist has a fleet of vehicles and a team of experienced drivers who know how to safely transport goods over long distances. They also have a network of storage facilities and contacts in different states, which helps make the process of moving house as smooth as possible. If you are moving interstate, then hiring an interstate removalist is the best way to ensure that your belongings arrive safe and sound.

The best removalist has the experience and expertise to ensure that your belongings are safely and securely transported to your new home. They will often provide a packing service to ensure that your items are protected as you are moving interstate, and they can also offer insurance in case of any damage or loss.

The best removalists can make moving houses much smoother and less stressful, so if you are planning a move, get in touch with a reputable company.

What Should You Look for in a Few Companies When Moving Interstate

Looking for a reliable and trustworthy professional removalists can feel daunting, especially if this is your first relocation across state lines. But with a bit of research and careful consideration of your budget and needs, you can find professionals who will take care of your heavy furniture, fragile items, and precious belongings.

Here are a few tips to help you choose the right the best removalist company for your upcoming move:

Experience

One of the most important things you should look for in a removals company is experience.

Ideally, you will want to find a furniture removals team that has been in the business for a few years and has completed many interstate moves.

This will give you peace of mind knowing that the removalists or removals company have the knowledge and experience required to safely and efficiently move your belongings when moving interstate.

Reliability

Another vital factor to consider when choosing a removals company is reliability. You will want to make sure that the team you select is punctual, professional, and able to stick to the schedule that they have agreed to.

The last thing you want is to delay your move because the removalist team failed to show up on time or didn’t complete the action on time.

Cost

Finally, you will want to carefully evaluate your budget and make sure that you find a removalist team within your price range. This doesn’t necessarily mean that you should choose the cheapest team available; instead, you should see a section that offers high-quality services at a price you can afford.

Customer Service

Last but not least, you should make sure that the interstate removalist team you choose offers excellent customer service. You should be able to quickly get in touch with someone from the team if you have any questions or concerns, and they should be more than happy to help you through every step of the moving process.

What Conditions Affect Interstate Moves?

Many different factors can affect the quality of an interstate removalist service.

One important consideration is the type and size of the truck used to transport items from one location to another.

Large trucks can be more efficient, making transporting large or bulky objects more accessible. However, smaller trucks may be preferable in some situations, as they can be more easily navigated through tight spaces or built-up areas.

You may also need special temperature-controlled trucks to transport sensitive items to changes in temperature or humidity, such as electronic equipment or musical instruments. Food items and perishables may also require a particular type of truck, as the ventilation and cooling systems can help to preserve these delicate items.

Another critical factor to consider is the weather conditions at the move.

If it is raining or snowing, this can make it more difficult to load and unload items, and it can also increase the risk of accidents.

It is vital to make sure that the team you choose is experienced in dealing with all types of weather conditions, as this will help ensure that your belongings are transported safely and securely.

Experience and knowledge of drivers and safety features such as seat belts and airbags.

Your drivers and movers should be able to handle all kinds of situations that may arise during the move. They should be experienced in safely loading and unloading large items such as furniture.

In short, many different conditions need to be considered when choosing an interstate removalist team. You can ensure that your upcoming move goes as smoothly and efficiently as possible by taking these factors into account.

Ultimately, an excellent interstate removalist service should prioritise efficiency and safety while remaining affordable and easy to use.

What Are the Different Types of Interstate Moves?

There are many different types of interstate moves that you can go through, and you should research the best style for your situation and take all the details into account when planning your move. Here are some of the most common types:

Door-to-door service

With this option, movers will load all of your belongings onto their trucks and deliver them to your new home. You won’t have to worry about renting a truck or making multiple trips – everything will be taken care of for you.

Full service

Full-service interstate moves are designed to make your life as easy as possible. In addition to loading and transporting your belongings, full-service movers will also pack them. They can even provide storage solutions if you need to temporarily store your belongings before they’re delivered to your new home.

Partial service

If you only need help with part of your interstate move, you can opt for a partial-service move. This might include transportation only, or it might consist of packing and loading assistance. You can customise your partial-service move to meet your specific needs.

DIY

Of course, you always have the option of doing everything yourself. If you’re up for the challenge, you can rent a truck and make as many trips as necessary to get your belongings to your new home. This is usually the most affordable option, but it’s also labour-intensive.

When you’re planning an interstate move, it’s essential to research your options and choose the type of move that best suits your needs. Be sure to consider all the details, including cost, convenience, and labour involved. With a bit of planning, you can make your interstate move as smooth and stress-free as possible.

The Difference the Best Interstate Removalists Make

Sure, you can plan an interstate move by yourself, but could you do it as well as the experts? Probably not, especially if you have a family or business to think about.

When faced with an interstate move, there are many factors you need to consider. You need to choose the right moving company, pack your items carefully so that nothing breaks in transit, and plan for any unforeseen circumstances.

The best interstate removalists will make your move stress-free by handling all the details for you. They will help you choose the right moving company, pack your belongings carefully, and plan for unforeseen circumstances.

They will also provide you with a free quote to budget for your move.

If you are planning an interstate move and want to make sure it goes smoothly, the best thing you can do is hire the experts.

Basement Cleanout Tips for a Thorough Clean

Basements are often neglected spaces in our homes. However, it is essential to do basement cleanup regularly to prevent mould and mildew growth and pests from taking up residence.

Here are a few tips for a thorough basement cleanout from basement cleaning experts:

  • Start by removing all the clutter from the space. This will make it easier to vacuum and scrub the floors and surfaces. If you need to move a lot objects during basement cleanouts, call junk removal experts to get rid of some items for you.
  • Next, vacuum the floors and all upholstered furniture. Don’t forget to move furniture to clean under and behind it when doing basement cleanout services.
  • Wash all the windows and window treatments. This will help brighten up the space in a decluttered basement.
  • Scrub all the walls, floors, and other surfaces with an appropriate cleaner for the material. This will help ensure that any mould or mildew growth is eliminated from all that extra space.
  • Once everything is clean, you should take steps to prevent future problems, such as installing a dehumidifier or sealing all cracks and gaps with caulking.

By following these tips for a thorough basement cleanout, you can keep your basement neat and tidy year-round.

What are the Common Problems with Basement Cleaning?

Basements can be problematic to clean because they are often dark and damp, leading to mould and mildew growth. Additionally, there can be a lot of unwanted items in basements, making it difficult to vacuum and scrub the floors and surfaces in just a few hours.

Fortunately, a few tips and tricks can help you clean your basement more effectively. These include removing clutter, vacuuming the floors and upholstered furniture, washing the windows and window treatments, scrubbing all surfaces with an appropriate cleaner, sealing cracks and gaps, and installing a dehumidifier to prevent mould growth.

What are the Benefits of a Clean Basement?

A clean basement has many benefits, including preventing mould and mildew growth, deterring pests, and brightening up the space. Additionally, a clean basement can make it easier to find things you need and help you avoid costly repairs in the future.

By taking the time to regularly clean your basement, you can enjoy many of these benefits and keep your home healthy and functional.​

Getting Rid of Water Stains

Flooding is a common problem in basements, and the resulting water stains can be difficult to remove. To get rid of water stains, start by mixing equal parts vinegar and water in a spray bottle. Then, spritz the solution onto the stained area and scrub it with a brush or sponge. If the stain is still visible, you may need to repeat this process a few times.

You can also use an enzyme-based cleaner to get rid of water stains. These cleaners break down the bacteria that cause odours and discolouration, leaving you with a clean, fresh space.

Another option is to remove the stain by sanding it down. Start by removing any loose paint or varnish with a scraper. Then, sand down the stain using medium-grit sandpaper. Once you’ve removed as much of the stain as possible, apply a new coat of paint or varnish and remove any imperfections with a fine-grit sandpaper.

Pest Infestation Problems

Having pests in the basement can make it difficult to do a thorough cleanout. If you have pests, your first step should be to seal any cracks or holes in the space. This will help keep the pests out and prevent them from returning.

You can also use an enzyme-based cleaner or store-bought pesticide to remove existing pests from the area. For small infestations, a simple spray application may be enough. However, you may need to call in a professional exterminator for larger infestations.

Mould and Mildew Issues

Mould and mildew can be a serious problem in basements, especially if the space is damp or humid. To clean mould and mildew, start by mixing equal parts of water and vinegar in a spray bottle. Then, spritz the solution onto the affected area and scrub it with a brush or sponge.

If the mould and mildew are still visible, you may need to repeat this process a few times. You can also use a store-bought mould and mildew cleaner for tougher stains.

Once you’ve removed the mould and mildew, focus on preventing it from returning by keeping the space well-ventilated and dry. You may consider installing a dehumidifier or using a fan to circulate air in the basement area.

To learn more about cleaning your basement, speak with a professional basement cleanout expert. These experts have the knowledge and experience to help you get rid of all the clutter in your basement, no matter what the condition of the space is.

Junk Removal and Decluttering

The first step to a thorough basement cleanout is removing any clutter from the space. To do this, start by sorting through your belongings and getting rid of anything that you no longer use or need

You can also organise smaller items like tools, toys, and sports equipment into labelled bins or boxes. This will help you clean out your basement faster, but it will also make it easier to find the things you need in the future.

Finally, don’t forget to recycle or donate any items still in good condition. This can help you reduce your overall clutter and declutter your home without having to waste resources by throwing them away.

When done properly, a basement cleanout can help you create a more functional and comfortable living space in your home. To learn more about completing the job effectively, speak with a basement cleanout expert.

Organising Your Basement

A cluttered and dirty basement can be a huge headache, especially when trying to clean it out. It can be difficult to know where to start if you’ve been storing years of excess stuff and unwanted items in your basement. The following tips will help you get your basement clean and organised in no time:

Start by sorting through everything in your basement.

You’ll need to decide what to keep, what to donate or sell, and what to throw away when you do a basement cleanout. This process can be overwhelming, so it’s important to take it slow and focus on one area at a time or call basement cleaning services to help you if things are a bit scary. They can also help free space or clean a storage unit, home gym, or garage.

Add shelves.

Once you’ve sorted through your belongings, it’s time to organise. Adding shelves is a great way to create more storage space and keep your basement organised. Don’t forget to get rid of the things you don’t need and call junk removal services to take them away.

Store items in separate containers.

Have space for computer items like spare keyboards and computer mice. You should also label these containers, so you know what goes where.

Use the walls.

If you’re short on space, utilise the walls by hanging bikes or other larger items, and this will free up floor space and make your basement look less cluttered.

Don’t forget the corners.

Corners are often neglected when it comes to cleaning and organisation. However, they can be great storage spaces for holiday decorations or out-of-season clothing items.

Clean regularly.

Once you’ve organised your basement, it’s important to keep it clean. Schedule some time each week to tidy up and dust surfaces. This will help prevent your basement from becoming cluttered and dirty again.

Add lights and proper ventilation.

A basement cleanout often requires some work, including hard labour and heavy lifting. Make sure you have proper ventilation and that the area is well lit.

With these tips in mind, you can keep your basement organised and clean. By following a regular basement cleaning routine and junk removal, you’ll be able to enjoy your new storage space for years to come.

Get Basement Cleanout Services

If you’re struggling to clean out your basement on your own or you simply don’t have the time, it may be time to call in a professional basement cleanout team. Basement cleaning services have the knowledge and experience to help you get rid of all the clutter in your basement, no matter the space’s condition.

Besides basement junk removal, basement cleanout experts can also provide advice on maintaining your basement and ensuring that it stays organised, clean, and clutter-free. So if you’re looking to make the most of your basement space, be sure to hire a basement junk removal professional for help.

5 Tips for Moving in Hot Weather

It’s hot outside. You’re moving, and you don’t want to deal with the heat, but you have to.

Moving is hard enough, but when it’s hot outside, it can feel downright impossible. Add in the extra burden of dealing with the heat, and you might be tempted to give up or succumb to heat exhaustion before you’ve even started.

Fortunately, here are a few tips to help make your move a little easier during the sweltering heat of the hot summer months.

Stay hydrated.

It’s essential to drink plenty of fluids when working in hot weather, especially when doing strenuous activity. Water is always the best choice, but sports drinks can also help replace electrolytes.

Many Australians suffer from dehydration without realising it, so make sure you’re drinking enough fluids and take regular breaks in the shade or with cold towels and portable fans to stay cool.

How do you know you’re getting dehydrated? The first signs are usually thirst, a dry mouth, headaches, and feeling dizzy. There’s also the possibility of suffering from heat stroke or other heat-related illnesses, which can be deadly.

Everyone is different, but experts typically recommend drinking six to eight glasses per day.

Avoid moving during the hottest part of the day.

If possible, start early in the morning or wait until the evening when the temperature has cooled down. This is especially true if you’re moving long distances.

The hottest times of the day are usually between 11 a.m. and 3 p.m., so do so if you can avoid these hours and stay cool as much as possible. Travelling under the heat of the sun will be uncomfortable, but it increases the chance of your items becoming damaged or breaking.

Consider hiring a moving company that provides climate-controlled trucks

If you’re moving long distances, particularly if you’re going to an area with extreme weather conditions, consider hiring movers who can provide climate-controlled trucks. This will help keep your belongings safe and protected from the heat, cold, and humidity.

Take breaks and find air conditioning.

When it’s hot outside, it’s important to take breaks often and stay out of the sun as much as possible. If you’re working with a moving company, make sure they are taking breaks.

Lifting heavy loads under the sun’s heat only add to exhaustion, so it pays to be careful. Make sure you have enough water on hand when you’re moving and keep sipping even while you’re working.

When packing your items and planning which rooms to move into first, keep in mind that having a shaded place will make the process more bearable. If it’s cooler inside your new home than the outside temperature, take advantage of this by starting there, so you don’t have to spend too much time moving boxes in the hot sun.

You may also want to take an ice bath or use a cool compress to lower your body temperature if you start to feel overheated. Better yet, find a place where there’s ample air conditioning and rest there in between loads.

Have the professional movers use cold towels and also hide from the extreme heat in a room with air conditioning during the hottest times of the day.

Dress appropriately.

Lightweight, loose-fitting clothing will help you stay cooler than heavy or constricting clothing. It’s also a good idea to wear a hat or sunglasses to protect yourself from the sun’s rays.

Cotton clothing is breathable and helps you keep cool, but be sure to wash it quickly if it gets sweaty or dirty.

You can also try wearing a cooling scarf or neck wrap. These are filled with a gel that absorbs heat and helps keep you cool. Arm sleeves also protect you from the sun’s rays and help you stay cool.

Apply sunscreen with an SPF of 30 or higher to all exposed skin. Reapply it every two hours, or more often if you’re sweating or directly under the sun’s heat.

Finally, wear eye protection. A good pair of sunglasses can mean the difference between a fun and safe day or a traumatic trip to the hospital.

Protect your belongings from a hot moving truck.

When packing up your belongings for the move, use plenty of padding and wrapping material to protect them from the heat. Electronics are especially vulnerable to heat damage, so take extra care with these items.

If you have food items that need to be moved, try to move them as close to the moving date possible. During hot weather, food can spoil quickly, and it’s best not to take a chance with your perishable items.

Heat can also affect your furniture and appliances. If you plan to move these items in hot weather, consider having them thoroughly cleaned and serviced before moving day.

How to Protect Your New Home from the Heat

Before moving into your new home, consider installing window shades or awnings that can cut down on the amount of direct sunlight that enters your home. This will help keep the house cool, and it will also help protect your belongings from fading or damage.

Another important step is to protect your belongings from the heat. For example, you may want to consider using climate-controlled storage units for any furniture or other items that are especially sensitive to heat and humidity.

Moving companies can help you find affordable options in your area.

In addition, make sure that there is sufficient ventilation in your new home. This is especially important if you live in an area with high humidity levels. Consider installing fans or air conditioners to help circulate the air and keep the house comfortable.

Is it Wise to Move During the Summer Heat?

The summertime is typically the busiest season for movers. Families with children often wait to make their moves until after the school year ends, and college students frequently use the summer as an opportunity to relocate before starting or returning to school in the fall.

Following the tips outlined above will help minimise the risks and stress associated with moving during the summer months. Whether you’re planning a long-distance move or a local one, careful planning will keep your family cool and comfortable as you enjoy your first days in your new home.

How to Clean Metal

Metal things, such as door and cabinet hardware, eating and cooking utensils, jewellery, and aesthetic objects such as picture frames, are practically impossible to find in a home. Every metal will eventually need to be cleaned to remove dust, filth, and, in many cases, tarnish or oxidation.

Tarnish forms on some untreated metals due to a chemical interaction between the metal and a nonmetal molecule, typically oxygen or sulphur dioxide. While not as destructive as rust, Tarnish seals the metal and shields the underlying layers from reactions.

What is the Type of Metal to be Cleaned?

Cleaning metal involves first determining what type of metal is being dealt with. Different metals require different cleaning methods, so it is essential to identify the material before beginning. Some common types of metal, including aluminium, brass, copper, iron, stainless steel, and silver, are prone to rust.

Soak Metal Surfaces in White Vinegar

One of the easiest ways to clean metal is to soak it in white vinegar. The acidity in the vinegar will help break down any dirt or grime built upon the metal’s surface. Fill a bowl or sink with enough white vinegar to completely cover the item you’re cleaning, and let it soak for a few hours or overnight. Rinse off the vinegar using warm water, and dry the metal thoroughly with cloth to avoid leaving any streaks.

Use Lemon Juice With Salt

Another simple method for cleaning metal is to combine equal parts lemon juice and salt to create an effective cleanser that will also remove tarnish from the surface of the metal. Dip a piece of cloth into the mixture and gently rub it all over the surface of the metal. Rinse off with warm water.

Use Crushed Aspirin or Baking Soda to Remove Rust

If your soft metal item has developed rust stains, you can use crushed aspirin or baking soda to remove them from its surface. Place a few crushed aspirins or baking soda on a soft cloth, and rub it all over the metal objects. Please leave it to work for about five minutes before rinsing off warm water.

Try Using a Homemade Cleaner

If you’re looking for an effective homemade cleaner for how to clean metal, try combining half a cup of salt with two tablespoons of white vinegar. Rub the mixture into the metal using a soft clean cotton cloth, and rinse off with warm water to remove any residue.

Use a Commercial Metal Cleaner

For tough stains or heavy build-ups of dirt and grime, you may need to use a commercial metal cleaning agent. Choose a metal cleaning solution specifically for the type of metal you are cleaning, and follow the manufacturer’s instructions to achieve excellent results. on the entire surface.

Keeping metal clean and shiny is a simple task if you know how to do it. By following these tips on cleaning metal, you will be able to clean metal surfaces and have them looking great in no time!

How to Clean Aluminium

If you’re looking for how to clean aluminium, the best thing to start with is mild dish soap and some warm water. If there are still stubborn stains on your aluminium surfaces and aluminum pots, try soaking it in a bowl of white vinegar overnight or using lemon juice and salt as an effective rust remover. You may need to use special aluminium pots cleaners for tough stains, but always follow the manufacturer’s instructions to avoid damage when you clean aluminium pots.

How to Clean Brass

Cleaning brass is best done with a soft cloth and a mild dish soap, as using anything too abrasive can damage the surface. If there are still stubborn stains, try soaking the brass in white vinegar or using crushed aspirin mixed with water to form a paste. Rub this paste onto the surface of the brass, leave for five minutes, then rinse off with warm water. You can also use a commercial brass cleaner, but always follow the manufacturer’s instructions to avoid damage.

How to Clean Copper

Copper can be cleaned using various methods, but one of the simplest is to mix equal parts salt and flour, then rub this mixture onto the copper surface with a soft cloth. Rinse off with warm water, and dry thoroughly to avoid any streaks. Alternatively, you can try using lemon juice or white vinegar to remove stains from copper surfaces. Finally, if you’re looking for an effective homemade cleaner, mix half a cup of salt with two tablespoons of white vinegar and rub it onto the surface with a soft cloth. Rinse off with warm water and dry thoroughly to achieve sparkling results.

How to Clean Iron

Iron can be cleaned using various methods, but the easiest way is to wipe it down with a soft cloth and some mild dish soap. If there are more stubborn stains or rust spots, you may need white vinegar or lemon juice as an effective rust remover. Another simple method is to try soaking your iron in a bowl of Coke overnight, then wiping it down with a soft cloth in the morning. You can also use a commercial iron cleaner, but always follow the manufacturer’s instructions to avoid damage.

Soft Cloth to Clean Stainless Steel

Stainless steel is a durable and easy-to-clean material, but it can still benefit from a little TLC from time to time. To clean stainless steel, mix equal parts of water and white vinegar in a spray bottle, and mist the solution onto the surface. Wipe away with a soft, lint-free cloth and buff with a dry cloth to achieve a streak-free shine. You can also use baking soda or commercial stainless steel cleaners for tough stains, but always follow the manufacturer’s instructions to avoid damage. With these tips on cleaning stainless steel, your metal surfaces will be looking great in no time!

How to Clean Silver

Cleaning silver can be a bit of a challenge, but there are several effective methods you can try. One popular way is to mix one part baking soda and three parts water, then dip a soft cloth into the mixture and rub it onto the surface. Rinse off with warm water and dry thoroughly to avoid any streaks. Alternatively, you can try using a combination of white vinegar and salt to form a paste, then rub the paste onto your silver surface with a soft cloth. Rinse off with warm water and polish dry with a lint-free cloth for clean, shiny results. With these tips on cleaning silver, you will be able to maintain your valuable silver pieces and keep them looking great!

Don’t Use Steel Wool When Cleaning Metal

When cleaning metal, you should avoid a few things to keep the metal from being damaged.

  • Don’t use harsh chemicals or abrasive cleaners, as these can damage the surface of the metal.
  • Don’t use a steel wool pad or any other type of scrubber, as this can also damage the surface of the metal.
  • Don’t use hot water, as this can cause metals to warp.
  • Don’t soak metals for too long in any cleaner, as this can also damage the surface.
  • Always rinse off cleaners entirely and dry the metal thoroughly to avoid any streaking or residue.

Conclusion

By following these tips, you can effectively and safely clean metal without damaging its surface or harming yourself. Be sure to read the labels on all cleaners on how to clean metal and follow the manufacturer’s instructions to avoid any accidents and keep metal’s natural shine.

With a little bit of care, you can keep your metal surfaces clean and looking like new!

DIY Mattress Cleaning

Sweat, drool, shed skin flakes, hair and skin oil, fresh urine stains, and other biological fluids are all exposed to your mattress. Add allergens, dust mites, and pet dander, which are common in most households, and your mattress is due for a cleaning.

Even though they use it daily, most individuals show their mattresses little affection, never giving them a thorough cleaning. But, just as you should clean a mattress and mattress covers regularly, you should also clean your mattress and washable mattress pad frequently.

When it comes time to clean your mattress, even your memory foam, you may already have everything you need on hand. While keeping your living area clean and fresh is critical. You may use natural techniques and essential substances (baking soda and vinegar) to freshen, clean, and scent your mattress, remove stains, and prepare your sleeping area for dreaming.

Many products on the market claim to clean your mattress, but when you read their labels, you’ll find that most contain potent chemicals and detergents that can harm our health. We will explore how easy it is to make a DIY mattress cleaning solution with natural ingredients to keep ourselves and our families safe.

What You’ll Need:

1/2 cup baking soda

1/2 cup white vinegar

1/2 cup water

Optional: 10-15 drops of essential oil (lavender, lemon, or tea tree oil)

Instructions to Clean Your Entire Mattress

Remove the Cover

Before you begin cleaning your mattress, it’s essential to remove the covers and wash them separately. You can either use your washing machine or hand-wash them with warm water and a natural detergent or soap.

Mix the Cleaning Solution

In a large bowl, combine the baking soda, vinegar, and water. Stir to distribute the ingredients evenly. Add them to the bowl and mix thoroughly if you’re using essential oils.

Apply the Solution with a Spray Bottle

Using a clean cloth or sponge, apply the cleaning solution to your mattress, covering the entire surface evenly. If you have a spot cleaner, you can use it in any area with tougher stains.

Let the Solution Sit

Allow the mixture to sit on your mattress for at least 20-30 minutes. This will give it time to break down stains and odours while also freshening and sanitising your mattress.

Wipe Away the Solution

After allowing the solution to sit, use a clean cloth or sponge to wipe away any residue. You can also vacuum your mattress to remove any remaining baking soda.

Let Your Mattress Dry

Once you’ve removed the cleaning solution, it’s essential to let your mattress dry completely before putting it on fresh sheets. This usually takes a few hours, but if your bed is still damp, you may need to leave it to dry overnight.

Sprinkle Baking Soda

Once your mattress is dry, you can help keep it fresh by sprinkling baking soda on the surface and letting it sit for 15-20 minutes. This will absorb any residual moisture and odours. Vacuum away the baking soda before making your bed with clean sheets.

Vacuum Your Mattress

Once your mattress is fully dry, it’s good to vacuum it to remove any lingering dust mites or allergens. You can use your vacuum’s upholstery attachment to make this process easier.

Use a Mattress Cover

Finally, you can place a clean mattress pad or cover on top to keep your mattress looking and smelling fresh. This will protect your mattress from stains and spills, making it easier to wash the covers separately.

Using this simple and natural DIY mattress cleaning solution, you can enjoy a fresh and clean sleeping space that will keep you safe from harmful chemicals and contaminants. And the next time you’re ready for a good night’s sleep, you can rest assured knowing that your mattress is clean and inviting.

Keep Mattresses Fresh:

Here are some tried-and-true methods for keeping your mattress clean and free of dust mites.

Wash your bed linens regularly.

At the absolute least, replace your linens every two weeks. If you don’t, the microscopic life that lives on your bedding has the potential to make you sick.

Spills should be cleaned up immediately.

Binge-watching our favourite shows is something that many of us enjoy doing. Accidental spills will happen, and it is best to wipe them up as soon as possible to avoid unpleasant aromas or lasting stains.

A mattress protector will keep your mattress safe.

Mattress protectors are waterproof, machine-washable covers that fit over your mattress like a fitted sheet. They help protect your mattress from stains and spills while extending its lifespan.

Turn and rotate your mattress every month.

Rotating or flipping a mattress is easy to extend its lifespan by a few years. This vital step can also help avoid compressing one side of the bed, making it crooked and uncomfortable to sleep on.

You can keep your mattress clean and fresh for many years by following these tips. And the next time you’re ready to rejuvenate your sleep space, you’ll have peace of mind knowing that your mattress is well taken care of!

What to Avoid when Cleaning a Mattress:

While cleaning your mattress is essential for your health and comfort, there are a few things to avoid during this process. Here are some tips to keep in mind.

Do not use harsh chemicals or cleaners.

Using too many of these products can damage the materials that make up your mattress, leading to more stains and odours. Even if you are cleaning mattress stains suck as urine stains or blood stains, you can still use a few drops of dish soap and baking soda to scrub away the filth. Some also use baking soda and hydrogen peroxide to work on the blood stains and other mattress stains.

Do not soak your mattress in water.

Professional mattress cleaning experts warn against soaking mattresses in water. This could damage the inner layers of the mattress, and it may take days or weeks for the bed to dry completely. This could also lead to the growth of mould and mildew.

Do not use a steam cleaner on your mattress.

The high temperatures from the steam can damage the materials of your mattress, and it may not be possible to remove all the moisture from the bed. This could lead to the growth of mould and mildew.

By following these mattress cleaning tips, you will be able to clean your mattress safely and effectively. And you’ll be able to rest easy knowing that your sleeping space is clean and healthy.​

Conclusion:

Mattress cleaning is vital for your health and comfort. You can keep your mattress clean and fresh for many years by following these simple mattress cleaning tips. And you’ll be able to rest easy knowing that you will be sleeping on a clean mattress that does not have dust mites.​

Sleep well!

Cleaning Blinds Guide

Blinds are among the most practical house furnishings, and they are excellent in blocking light and providing needed seclusion while keeping the space cool. They are, however, notorious for becoming filthy regularly, and they gather dust, pet hair, and other debris from the house.

Cleaning the blinds is not something that most people enjoy doing, and you may find yourself putting off work more frequently. This tutorial will explain why you should clean your blinds and how to do so to assist you.

Keeping Window Blinds Clean

The main reason to keep your blinds clean is so that they will last a long time. Allowing dust and debris to accumulate will eventually work into the fabric, causing wear and tear. Additionally, build-up on the blinds can attract insects or other pests.

Cleaning the blinds is also essential for maintaining a healthy environment in your home. Dust mites, tiny creatures that thrive in dirty environments, cause asthma and other respiratory problems. By keeping your blinds clean, you can help reduce the number of dust mites in your home.

Finally, cleaning the blinds can improve the appearance of your home. Dirty blinds can make a room look messy and unkempt. By taking the time to clean them, you can help give your home a neater and more polished look.

How Often Should You Clean Window Blinds?

Wooden blinds, and other variations such as roman blinds, faux wood blinds, vertical roller blinds, and horizontal slats should always be dusted once a week at the very least. If you have pets or live in a dusty area, you may need to brush them more frequently. You should also deep clean your wooden blinds and window coverings at least once a month.

Cleaning Equipment for Blinds

There is no single ideal approach to cleaning roller blinds. The methods and tools you use to clean wood blinds will vary depending on how much dust has gathered and how dirty the roman blinds are.

Whatever material your horizontal blinds are made of, you’ll need to put together the following items:

  • Vacuum brush attachment
  • Microfiber towels or a microfiber tiny blind duster (available online or at a hardware store). It’s an excellent tool because it covers several blind layers at once.
  • Warm soapy water
  • Stain remover
  • Dry cloth

Cleaning Blinds Is Simple

The majority of the build-up on your blinds is dust. Because dust and water can combine to make a horrible mess, it’s better to start cleaning dry.

How to Clean Wood and Plastic Blinds

  • Making use of a microfiber small blind duster
  • Leave the blinds open and sweep the duster from top to bottom. Working at the top ensures that any dust that falls while cleaning the blinds is cleared as you work your way down to the lowest level.
  • After you’ve dusted down, use the vacuum cleaner attachment to remove any remaining dust.

Use a Damp Cloth

  • Wet the microfiber towel with cool water and wipe down each blind slat.
  • Use a different microfiber towel to dry the slats as you go along.
  • If any dirt or grime remains on the blinds, make a cleaning solution by mixing two cups of cool water and one teaspoon of dishwashing liquid.
  • Dip the microfiber in the solution and use it to scrub any areas that are still dirty.
  • Rinse the blinds with cool water to remove any soap residue and dry them with a clean damp cloth.

Cleaning Aluminum Blinds

Because aluminium is a non-porous material, it doesn’t absorb dust and dirt as wood or fabric does. As a result, cleaning aluminium blinds is much simpler than cleaning other types of blinds.

  • Start by dusting the blinds with a microfiber towel or duster with a brush attachment.
  • Next, use a vacuum cleaner with a soft brush attachment to remove any remaining duston the window blinds.
  • If the window blinds are still dirty, wet a microfiber cloth with cool water and use it to wipe them down.
  • Enjoy your clean window blinds by drying them with a clean cloth!

Cleaning Fabric Blinds

Deep cleaning fabric blinds are more involved than cleaning other types of blinds. To clean the blinds, remove them from the window and take them outside.

  • Start by vacuuming the blinds with the brush attachment to remove loose dirt or dust.
  • Next, mix one teaspoon of dishwashing liquid with two cups of cool water.
  • Dip a clean microfiber cloth in the solution and use it to scrub any areas that are still dirty.
  • Rinse the blinds with cool water to remove any soap residue and dry them with a clean microfiber cloth.
  • Finally, hang the blinds back up and enjoy your clean blinds!

Cleaning Vertical Blinds

Vertical blinds can be a bit trickier to clean than other blinds because they have more nooks and crannies for the dust to hide in. However, with a little bit of elbow grease, you can get them looking good as new.

  • Start by dusting the blinds with a microfiber cloth or duster.
  • Next, use a vacuum cleaner with a soft brush attachment to remove any remaining dust.
  • If the blinds are still dirty, wet a microfiber cloth with cool water and use it to wipe them down.
  • After cleaning the blinds, dry them with a clean microfiber cloth and enjoy your clean blinds!

Cleaning Automated Blinds

If you’re lucky enough to have automated blinds, then you know that they can be a bit of a pain to clean. However, you can get them looking good as new with patience.

  • Start by dusting the blinds with a microfiber cloth or duster.
  • Next, use a vacuum cleaner with a soft brush attachment to remove any remaining dust.
  • If the blinds are still dirty, wet a microfiber cloth with cool water and use it to wipe them down.
  • Dry the blinds with a clean microfiber cloth and enjoy your clean blinds!

Maintaining your motorized blinds will allow you to enjoy their convenience for many years to come.

Can I Steam Clean My Blinds?

According to some sources, you can steam clean your imitation wooden blinds. We believe that this is a precarious option and best avoided. If you burn actual wooden blinds, the moisture and heat will probably cause them to warp and ruin the coating that protects the wood. If you steam plastic blinds, the heat may cause the plastic to melt, causing warping of the slats partially.

Young Smiling Woman Washing Window with Sponge. Happy Beautiful Girl wearing Protective Gloves Cleaning Window by spraying Cleaning Products and wiping with Sponge. Woman Cleaning House

Leave Roller Blinds to the Pros

If you’re not interested in cleaning your blinds, or if they are too difficult to reach, there’s no shame in hiring a cleaning professional to clean your venetian blinds, vertical slats, window dressings, and window treatments in general. They are experts and know how to remove dust, use a vacuum brush attachment to deep clean and then remove tough stains from vinyl blinds, honeycomb blinds and roller shades.

Cleaning services will have the proper tools and know-how to ensure that your venetian blinds are cleaned correctly. They will also be able to clean hard-to-reach areas that may be difficult for you to get to.

Schedule a cleaning service today, and rest easy knowing that the pros will care for your venetian blinds and window treatments.

BBQ Cleaning Tips

As grill season is soon approaching, it’s time to get your gear ready for another season of outdoor cookouts, burgers, and barbecues. Clean the entire grill of any leftovers from last summer’s BBQ adventures before you begin cooking. Even if you cleaned the grill before storing it for the winter, it’s necessary to clean the bbq grill thoroughly with hot soapy water and a grill brush at the start of each new season.

The same grilling methods that produce delectable char marks on your burgers and steaks also result in carbon deposits. These will sit on practically every grill surface, including the cast iron grill grates, hood, firebox interior, flavouring bars, and burner tubes (on gas grills).

These carbon deposits will eventually lead to rusting on a dirty grill, which means it’s not just the flavour of your food that will suffer—the function and longevity of your barbecue grills will be affected.

These crusty carbon deposits are not just unsightly; grease and sweet sauces can adhere to them and contain bacteria. Excessive carbon accumulation can also cause the charcoal grills to heat unevenly, fail to achieve full operational temperature, and cause the gas-burner tubes to break prematurely.

After each use, get the grill clean and cooking grates with a quick scrub to make it easier to clean at the start of each new cooking season.

Grill Brush and Other Cleaning Materials

To clean your grill, you’ll need some basic supplies:

  • A grill brush for scrubbing the grates
  • A putty knife, bbq scraper, or old toothbrush for cleaning out the firebox
  • A garden hose with a spray nozzle
  • A sponge or cloths
  • Some cleaner (a degreaser, stainless steel cleaner, all-purpose cleaner, or vinegar will work)
  • Soapy water or washing up liquid cleaner

If you have a gas grill, you’ll also need:

  • A can of compressed air (optional but helpful)
  • A small paintbrush (optional)

Cleaning Your Grill Grates

Preheat

To begin cleaning a gas grill, turn it on, close the hood, and let it come up to temperature. Give at least 30 minutes for every stuck-on food or debris to dissolve. Then, dip the wire brush in a warm, soapy water bucket and clean the carbon off the grates. After that, switch off the gas and unhook and remove the propane tank. Allow the grill to cool completely before resuming use.

Place the used charcoal briquettes in a metal container designed for charcoal grills. Scrape away any caked-on charcoal dust and debris with a putty knife. To clean the grates, you can also use a wire brush.

Soak in Hot Soapy Water

The firebox interior is now visible and accessible after the grill grates have been removed. Begin by placing an empty bucket behind the firebox, right beneath the grease tray entrance, to capture the soapy water and debris flushed out. Scrape any caked-on crud from the firebox with a plastic putty knife.

To remove any leftover loose material, use a wet/dry vacuum. Because damp/dry vacuums are typically used in the workshop, you shouldn’t feel awful about using one to suck up the crud that’s accumulated in your grill. After cleaning the firebox, rinse it with a garden hose.

Scrub Everything

Remove the grates and panels once soaked and scrub them with a wire brush. For highly resistant burnt on food, make a mixture of white vinegar and baking soda and apply it directly to the most complex caked-on particles of dirt and food debris.

To avoid rusting, thoroughly rinse and dry cast-iron grates. It is an excellent opportunity to inspect the porcelain grates for chipping, leading to corrosion. Touch up any cracks or chips with a light coating touch-up paint. You can also spray some cooking oil or vegetable oil to season the charcoal grate.

Inspect your burners and cast iron hotplates for evidence of corrosion or obstructions in the row of flame-emitting holes. If your grill is left unused for an extended period, spiders will lay eggs in the burner tubing—brushback and forth across the surface with grill brushes.

Wipe it Down

Next, clean the outside of your grill with an all-purpose cleaner and a sponge. Don’t forget to clean the control knobs (on gas grills) and any side shelves or tables.

If you have a charcoal bbq grill, remove the ashes from the bottom of the firebox. You can dump them in a metal trash can or bucket.

Reassemble and Relight

Once everything is clean, put your gas bbq back together, ensuring that all the parts are properly secured. If you’re using a gas barbecue grill, remember to reattach the propane tank before turning on the gas. Test all the knobs to make sure they’re working correctly.

For a charcoal grill, fill the firebox with fresh briquettes, light them, and allow them to reach temperature before cooking on it.

Clean Your Grill Cover

Your grill’s cover will need to be cleaned from time to time. The best way to clean a grill cover that has stuck on food is to spray it down with a hose and scrub it with warm soapy water. Allow it to air dry after properly rinsing it.

You may also wash it on a gentle cycle with cold water and light detergent in your washing machine with a little baking soda. Allow it to air dry or set it in a low-heat drier.

Fire it up and enjoy it once your grill is clean and ready to go!

Frequently Asked Questions

How frequently should I clean my grill?

Always clean your grill before using it. If you cannot do so, attempt to clean it at least once a week.

Can I clean my BBQ grill using oven cleaner?

Yes, grills may be cleaned with hot water and some cleaning agent. Wear gloves and a mask because the fumes can be dangerous. Also, after applying oven cleaner, carefully rinse the grill with warm water. You may also use some baking soda to clean stainless steel.

How do you clean a stainless steel grill?

To clean a stainless steel grill, use a vinegar-and-water solution or some baking soda and hot water. Scrub any dirt or filth from the grill using a sponge or towel. Rinse it with clean warm water and pat it dry with a towel.

To clean a stainless steel grill, never use strong chemicals or abrasive products.

How can I get the rust off my barbecue grates?

If your grill grates are rusted, try washing them with a wire brush or cleaning them with a vinegar-and-water solution. Most of the time, warm soapy water works for cleaning stainless steel, including the hot bars.

It is ideal to clean a bbq or still warm grill and bbq plates of excess food and excess grease before you use it again. The food cooked will taste so much better since there is no dirt and grime attached on the cooking surface. You can use a spray bottle and paper towel to keep a bbq clean.

Do I need to grease my barbecue grates?

Oiling your grill grates prevents food from sticking to them. Apply a light coat of oil before cooking.