Professional Window Cleaning

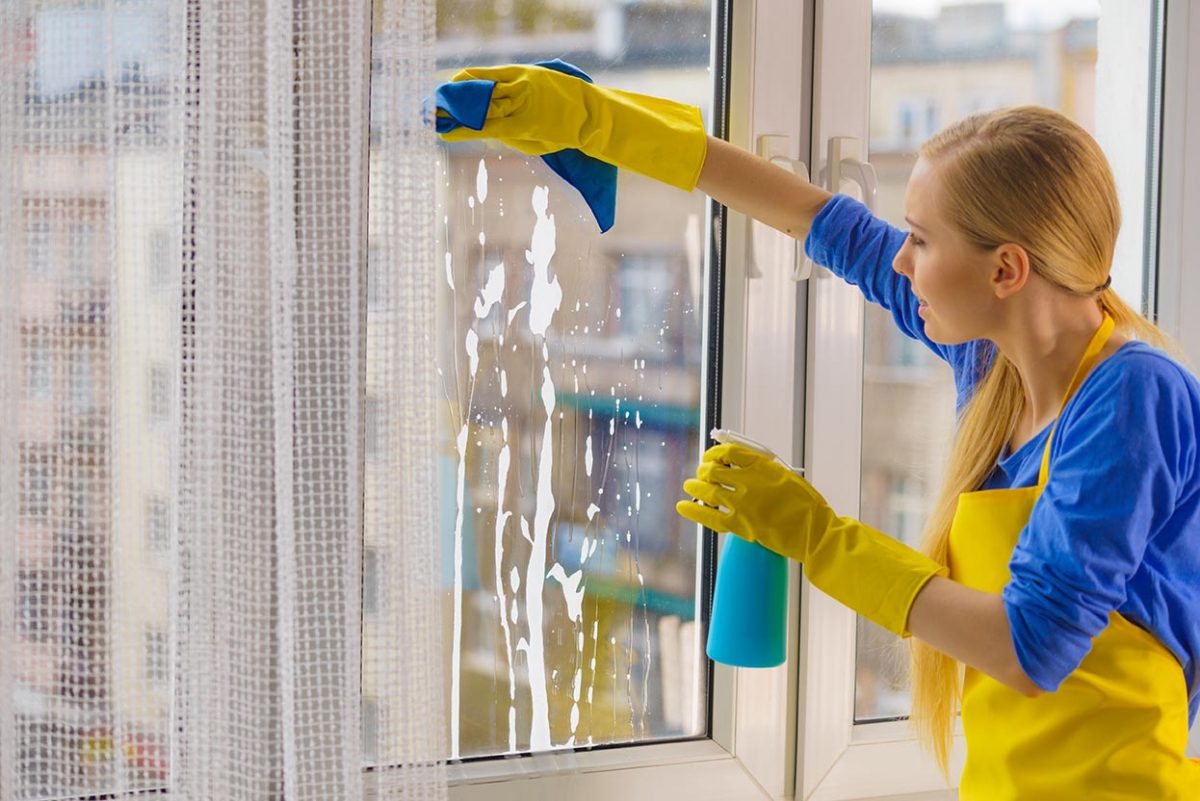
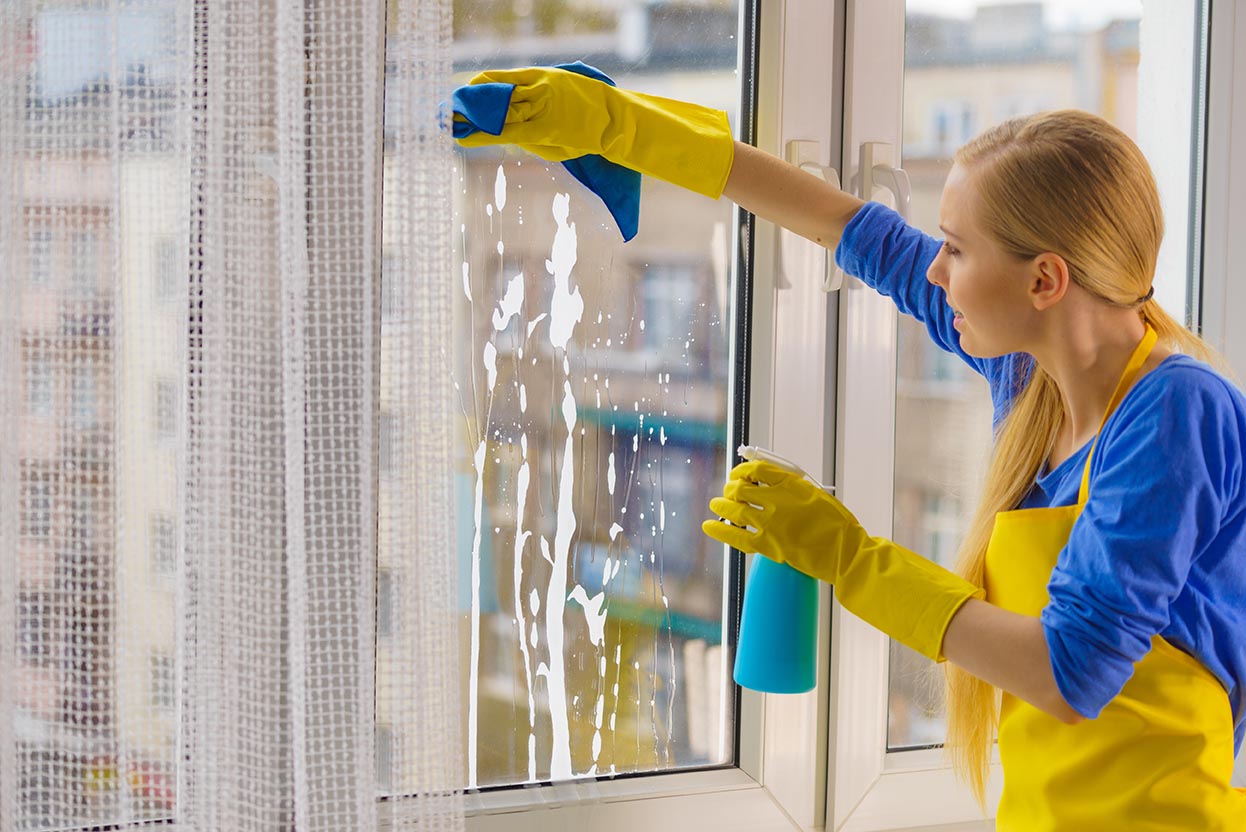
Sometimes we neglect cleaning the house windows, either because we are too busy or do not think it is necessary. Keeping your windows clean, both for your health and appearance is imperative. Dust, dirt, and other allergens can quickly build up on windows, causing various respiratory problems. Additionally, dirty windows are not very aesthetically pleasing.

If you may not have the time or energy to clean your windows, there are window cleaners who can help. These services employ high-powered equipment and chemicals to swiftly and thoroughly clean your windows.

You can be confident that your windows will remain clean for an extended time when you use a window cleaner This is because they clean the glass and the surrounding areas, such as the window frames and ledges.

Be sure to research different window cleaners to find the best one for you.

The Benefits of Hiring a Professional Window Cleaning Service

Hiring a professional window cleaners service has numerous advantages, including:

They will save you time.

Cleaning windows is a time-consuming task, and if you have a busy schedule, it can be challenging to find the time to do it yourself. Hiring commercial window cleaning will free up your time to focus on more important things.

They will save you money.

When you do not clean your windows regularly, they will become stained and scratched. Repairing this can be costly, but if you engage professional window cleaning services or residential window cleaning experts, they will be able to keep your windows in good condition and avoid the need for expensive repairs.

They will make your house look nicer.

Clean windows may make a significant impact on the appearance of your home, and cleaning services will also boost the value of your home if you decide to sell it in the future.

They will benefit your health.

Dust, grime, and other allergens can accumulate on exterior windows, creating respiratory difficulties. If you have allergies or asthma, you must keep clean windows all the time. Hiring commercial window cleaning would eliminate these allergens and improve your overall health.

If you are looking for a way to save time and money, and improve the appearance and health of your home, hiring a cleaning services to clean windows on residential and commercial properties is a great option.

What is the Window Cleaning Procedure?

When you engage a professional window cleaning company, they will follow a precise technique to ensure that your windows are properly cleaned. This procedure entails:

Inspecting the windows.

The first step is to inspect the windows to determine how to clean them. The type of window, the amount of dirt and grime, and other factors will all be considered.

Pre-cleaning the windows.

Once the inspection is complete, the window cleaning company will pre-clean the windows to remove loose dirt and debris, making the actual cleaning process much easier and more effective.

Cleaning the windows.

The next step is to clean the windows using various tools and solutions. This may include scrubbing, power washing, or using unique cleaning solutions.

Drying the windows.

Once the windows have been cleaned, they will be dried to prevent streaking and water spots.

Inspecting the results.

After the windows have been cleaned and dried, the window cleaning company will inspect the results to ensure that you are satisfied.

The window cleaning procedure may vary slightly depending on the company you hire, but these are generally the steps followed.

Types of Windows

There are a few types of windows, and each one necessitates a different cleaning approach.

Glass windows are the most popular form of window. The most prevalent window seen in houses and businesses is glass windows. They are simple to clean, and however, they might develop streaks and wet marks if not cleaned properly.

Vinyl Windows comprises long-lasting plastic and is widely used in homes and businesses. They are simple to maintain but can be quickly scratched if not properly cleaned.

Wood windows. Wood windows are not as prevalent as glass or vinyl windows, but they can be found in some homes and businesses. To avoid damage, they must be cleaned with extreme caution.

How Often Should You Clean Your Windows?

The frequency with which you clean your windows is determined by various factors, including the type of window, the climate you live in, and the amount of traffic in your home. However, it is advised that you clean your windows at least once a year. If you live in a polluted or dirty location, you may need to clean your windows more frequently.

Can I Clean My Windows?

You can clean your windows, but it is generally not recommended. Window cleaning is a time-consuming and challenging task, and if it is not done correctly, you could damage your windows. In addition, if you are not experienced in window cleaning, you could end up with streaks or water spots. To guarantee that your windows are properly cleaned, it is always better to engage a professional window cleaning service.

How Much Does Window Cleaning Cost?

The cost of window cleaning will vary depending on the size of your home, the number of windows you have, and the company you hire. However, you can expect to pay between $75 and $150 for a professional window cleaning service.

Conclusion

Hiring an experienced window cleaning service is the most effective approach to cleaning your windows regularly and adequately. Find a window cleaning company with experience and a solid reputation if you’re looking for one. You can get recommendations from friends and relatives or look for reviews online. When you’ve identified a few companies, compare their costs and offerings to discover the best bargain.

How to Clean Wallpaper

Even the most conscientious cleaner can overlook wallpaper. It’s easy to manage. We usually don’t think about it until we undertake a spring cleaning or discover that an artistic child has found their first canvas.

Dirt and dust are attracted to wallpaper. As a result, most wallpaper benefits from a once-in-a-while cleaning. Depending on the condition of your wallpaper, cleaning it may include dusting and stain removal. Fortunately, this is not insurmountable. You can restore your walls to their original state with the correct materials, perseverance, and elbow grease.

How to clean wallpaper? Here are expert tips how.

Vinyl and Fiberglass Wallpapers and More!

There are different types of wallpaper available on the market, each with its strengths and weaknesses. Here is a brief overview of the most popular types and how to clean wallpaper:

Vinyl Wallpaper

Vinyl wallpaper is one of the most popular types of wallpaper. It’s durable, easy to clean, and relatively inexpensive. However, it can be difficult to remove and is not always the best choice for areas prone to moisture. Vinyl coated fabric can be cleaned with a damp sponge or microfiber cloth. You just gently rub it or use a wall brush extension to clean vinyl wallpaper.

Foil Wallpaper

Foil wallpaper is made of thin sheets of metal or plastic applied to the wall. It’s important to note that this type of wallpaper is not ideal for areas subject to moisture, as it can rust over time. This is non washable wallpaper and should not be exposed to warm water. When you clean non washable wallpaper, just use paper towels to wipe off grease stains, mildew stains, and dirt.

Fabric Wallpaper

Fabric wallpaper is made of, you guessed it, fabric. It’s a good choice for areas subject to moisture, as it’s more resistant to mould and mildew than other types of wallpaper. However, it can be more expensive than different types of wallpaper and is not onea of the more durable wallpapers.

Paper Wallpaper

Paper wallpaper is the most traditional type of wallpaper. It’s generally less expensive than other types of wallpaper and is easy to install and remove. However, it’s not as durable as other options and is more likely to tear or fade over time.

Now that you know a little more about the different types of wallpaper, you can decide which type is right for your home and how to clean wallpaper properly.

How to Remove Wallpaper

Removing wallpaper can be a daunting task, but it doesn’t have to be. You can remove even the most stubborn wallpaper with the right tools and patience.

To remove wallpaper, you’ll need:

  • A ladder or step stool
  • A putty knife
  • A scoring tool
  • A sponge or cloth
  • Water
  • Mild soap (optional)

Instructions

1. Start by scoring the wallpaper. Use a scoring tool to make small holes in the wallpaper. This will help the wallpaper remover penetrate the paper and loosen the adhesive.

2. Once you’ve scored the wallpaper, it’s time to apply the wallpaper remover. There are several commercial products available, or you can make your own. Mix one part vinegar with two parts water to make your wallpaper remover.

3. Apply the wallpaper remover to the scored areas of the wallpaper. Be sure to coat the paper evenly.

4. Allow the wallpaper remover to sit for at least 15 minutes, giving it time to penetrate the paper and loosen the adhesive.

5. After 15 minutes, use a putty knife or scraper to remove the wallpaper. Start at the top and work your way down.

6. Use a sponge or cloth to wipe away any leftover adhesive.

7. Repeat these steps until all the wallpaper has been removed.

8. Once the wallpaper is gone, you may want to wash the walls with a mild soap and water solution to remove any lingering residue.

9. Allow the walls to dry completely before painting or wallpapering.

With a little bit of time and effort, you can remove even the most stubborn wallpaper. Just be sure to take your time and work carefully to avoid damaging the wall.

How to Keep Your Wallpaper Clean

To keep your wallpaper clean, you should:

  • Vacuum regularly with the soft brush attachment.
  • Wipe down wallpaper with a damp sponge or cloth. Be sure to use gentle pressure and circular motions.
  • Remove any spots or stains as soon as possible.

What You’ll Need

To clean your wallpaper, you’ll need:

  • A ladder or step stool
  • A vacuum with a soft brush attachment
  • A sponge or soft cloth
  • Mild soap
  • Water
  • Stain remover (optional)

Cleaning Wallpapers Step By Step

1. Start by dusting your wallpaper.

Use the soft brush attachment on your vacuum to go over the wallpaper. If you don’t have a vacuum with a soft brush attachment, you can use a feather duster. Be sure to dust in gentle, circular motions to avoid damaging the wallpaper.

2. Once you’ve dusted the wallpaper, it’s time to wipe it down.

Dip your sponge or cloth in a mixture of mild soap and water. Wring it out so that it’s damp but not dripping wet. Gently wipe down the wallpaper in circular motions.

3. If you have any spots or grease stains on your wallpaper, treat them now.

You can use a commercial spot and stain remover or make your own. Mix one part vinegar with two parts water to make your spot and stain remover. Apply the mixture to the stain with a sponge or cloth and blot until the stain is gone.

4. Once you’ve finished cleaning the wallpaper, allow it to air dry.

Once dry, vacuum or dust it again to remove any soap residue.

5. Repeat these steps as necessary to keep your wallpaper clean.

For best results, vacuum and dust it once a week and wipe it down with a damp sponge or cloth every other week.

With a little bit of regular maintenance, you can keep your wallpaper looking new. Just be sure to use gentle pressure and circular motions when cleaning to avoid damaging the paper.

The Most Common Mistakes When Cleaning Wallpaper

One of the most common mistakes people make when cleaning wallpaper is using too much water. Using too much water can cause the wallpaper to swell and loosen from the wall, leading to wrinkles, bubbles, and even tears. To avoid this, be sure to use a damp sponge or cloth and wring it out well before cleaning.

Wrong Cleaning Solution

You should also avoid using cleaners that contain ammonia, as this can also damage the wallpaper.

Using the wrong cleaning solution is another common mistake. Many people think that using vinegar or other harsh chemicals will help remove dirt and stains from wallpaper, but these can damage the wallpaper in reality.

To avoid this, be sure to use a mild soap or detergent and test it in an inconspicuous area before using it on the entire wall.

Cleaning Tools

Another mistake people make when cleaning wallpaper is using the wrong tools. For example, using a rough brush or scrubber can damage the wallpaper and cause it to fade or peel

Instead, opt for a soft sponge or cloth, and use gentle strokes.

Too Much Pressure

Applying too much pressure when cleaning is another mistake that can damage the wallpaper. Be sure to use light pressure and avoid scrubbing too hard, as this can cause the wallpaper to fade, peel, or tear.

Final Thoughts

Cleaning wallpaper is a simple process, but it’s essential to do it carefully. Be sure to vacuum and dust regularly, and wipe down the wallpaper with a damp sponge or cloth. If you have any spots or stains, treat them soon.

With a little bit of care, you can keep your wallpaper looking new for years to come.

Safe Way to Clean Bamboo Floors

Nowadays, many houses have bamboo flooring because it looks elegant and natural. If you have bamboo floors, you know how difficult they can be to keep clean. Bamboo is an absorbent material, so spills and stains can easily seep in and become permanent. In addition, bamboo is also susceptible to scratches and scuffs.

How to Take Care of Your Bamboo Flooring

To keep your bamboo flooring looking beautiful, follow these simple deep cleaning tips:

Clean up any debris with a brush or vacuum.

Keep a soft-bristle or fine-fibre broom handy to keep your wood floors in pristine condition. Gritty dirt and dust can scrape the floor’s surface if it is not swept regularly, ideally once a day. While vacuuming bamboo flooring is safe, the vacuum must be fitted with a floor cleaning attachment or a hard floor setting to avoid damage. Standard vacuums with big wheels and revolving brushes that can produce scratches or dents should be avoided.

Use a microfiber mop or soft cloth to clean bamboo flooring

Clean bamboo floors with a dust mop or slightly damp cloth is the best way to remove dirt and grime without damaging the new bamboo flooring. Avoid using too much water, as this can cause warping and discolouration. If you must use bamboo floor cleaners, choose one designed specifically for a hardwood floor.

Avoid using cleaners that contain vinegar, ammonia, or alcohol, as these can dull the finish or damage vertical bamboo flooring.

Dry immediately after cleaning.

After cleaning your bamboo floor with a damp mop or cloth, dry it thoroughly with a clean towel. Allowing the floor to air dry is the best way to prevent water damage on clean bamboo floors.

Apply cleaner every few months.

Apply a bamboo floor cleaner every few months to keep your bamboo floor looking their best. These cleaners help replenish the finish and protect the floor from dirt and debris. Follow the manufacturer’s instructions for application and always test the bamboo floor cleaner or any cleaning solution in an inconspicuous area before applying it to the entire floor.

Polish your bamboo floor every 6 to 12 months.

To maintain the shine of your bamboo floor:

  1. Polish them every 6 to 12 months.
  2. Use a polish designed specifically for hardwood floors and follow the manufacturer’s instructions for application of any cleaning solution.
  3. Always test the polish in a small area before applying it to the entire floor.

Avoid using furniture pads on clean bamboo flooring.

Furniture pads are not necessary on bamboo planks and can cause damage. The places can hold moisture against the floor, which can cause warping and discolouration. In addition, the constant friction of the furniture legs on the pads can scuff the bamboo floor finish.

Place mats at all entrances to your home.

To help protect your bamboo floor from dirt and debris, placemats at all entrances to your home. Choose mats made of natural fibre, such as coir or jute, and avoid those with a rubber backing, which can hold moisture against the bamboo floor. Shake or vacuum the mats regularly to remove any dirt or debris that has been tracked in.

Rugs are also a great way to add style to your home and protect your bamboo planks from wear and tear.

Take off your shoes before walking on wood floors.

Shoes can track in dirt and debris that can scratch or dull the shine bamboo floors naturally have. A good tip for maintaining bamboo floors is to create a no-shoes policy in your home and place a mat or rug at all entrances to encourage people to take their shoes off before walking on the floor.

Place felt pads on furniture legs.

Felt pads are an easy way to protect your bamboo floors from scratches and scuffs. Attach the pads to the bottoms of all furniture legs and chairs, and replace them regularly to ensure they stay firmly in place.

Avoid using harsh chemicals.

Harsh chemicals can damage the finish of bamboo floors and make them more susceptible to dirt and debris. When cleaning bamboo floors, avoid using cleaners that contain vinegar, ammonia, or alcohol. In addition, avoid using furniture polish, as this can also damage the finish. If you must use a cleanser, choose one specifically designed for hardwood floors when cleaning bamboo flooring.

Take care when moving furniture on bamboo floors.

When moving furniture on bamboo floors, take care to prevent scratches and scuffs. Place felt pads on the bottoms of furniture legs and chairs, and be sure to lift furniture rather than dragging it across the floor. In addition, avoid using rollers or casters on the table, as these can also damage the floor.

The Benefits and Drawbacks of Bamboo Flooring

Bamboo flooring is a popular choice for many homeowners because it is durable, eco-friendly, and easy to maintain. However, there are a few things to consider before choosing bamboo floors for your home.

Benefits:

Bamboo floors are very durable and can last up to 25 years with proper care.

  • Bamboo floors are eco-friendly since bamboo is a renewable resource.
  • Bamboo floors are easy to maintain and only need to be swept or vacuumed regularly.
  • Bamboo floors are resistant to scratches, staining, and fading.

Drawbacks:

  • Bamboo floors can be damaged by water or excessive humidity.
  • Bamboo floors can be scratched or dented by heavy furniture.
  • Bamboo floors may fade in direct sunlight.

If you’re considering bamboo floors for your home, weigh the pros and cons to decide if they’re right.

The product you need to avoid:

  • Bleach
  • Ammonia
  • Furniture polish
  • Baking soda
  • Vinegar
  • Waxes
  • Hydrogen peroxide
  • Rubbing alcohol
vacuum cleaner on the floor showing house cleaning concept

Final Thoughts

Bamboo flooring is a popular choice for many homeowners because they are durable, eco-friendly, and easy to maintain. However, there are a few things to consider before choosing bamboo floor for your home. Bamboo floor can be damaged by water or excessive humidity, so they may not be the best choice for rooms with a lot of traffic or are prone to spills.

Bamboo flooring is a beautiful and durable option for your home. Follow these tips on cleaning and maintaining bamboo floor to keep them looking their best. By taking proper care of your floors, you can enjoy them for years to come.

How to Remove Mould From Leather

Leather is beautiful, but it can be challenging to keep in good condition. It is susceptible to mould and mildew growth, but once leather goods have accumulated stains or wear, they can be challenging to restore. How many leather goods have you discarded because you were unaware of how to clean them? That is all about to change today, as we offer our preferred methods for removing mould from leather.

Mildew stains are not picky. Mould can appear almost anywhere, no matter how much you adore an item or what leather brand you own. It is likely mildew if you notice any white, powdery substance on your leather. The good news is that it is cleanable!

The Simple Way to Remove Mold and Mildew from Leather

The best approach to cleaning mould and mildew relies entirely on the fungus-infested surface. Cleaning leather is not the same as cleaning your carpet or bathroom tile. Examine our mould cleaning recipes for leather to see which is best for you.

What you need:

–A bucket

-Warm water

-Mild dish soap or saddle soap

-Soft cloths or a sponge

-A dry, soft towel

Instructions:

1) Mix equal parts of the mild dish soap and warm water in your bucket. If you cannot find mild dish soap, substitute it with saddle soap.

2) To avoid damaging your leather, test the soap mixture on an inconspicuous area first.

3) If the leather can withstand the mixture, proceed to clean the mouldy areas with a soft cloth or sponge.

4) Rinse the leather with warm water and dry it off with a soft towel.

5) If the mouldy smell lingers, try using a leather conditioner or freshener.

Preventing Mold and Mildew on Leather

Once you have removed mould and mildew from your leather goods, it is essential to take steps to prevent their return. The key is to keep your leather as dry as possible, as mould thrives in humid environments.

Here are some pointers to keep your leather mould-free:

– Store your leather goods in a cool, dry place.

– If possible, avoid storing leather in plastic bags, as this can trap moisture and lead to mould growth.

– If your leather goods will be stored for an extended period, consider using cedar balls or sachets to keep them fresh and dry.

– When cleaning your leather goods, use only a damp cloth; avoid saturating the leather with water.

You’ll be able to enjoy your leather products for many years to come if you keep these tips in mind!

Can Rubbing Alcohol Removes Mold From Leather Car Seats?

Mould can be difficult to remove from leather car seats since there are many folds for mildew to hide in. However, by mixing a few materials that you most likely already have on hand, you can create a solution for cleaning leather car seats that will leave them looking new.

What You’ll Need:

-Rubbing alcohol

-Water

-A spray bottle

-A clean, dry rag

Instructions:

1) In your spray bottle, mix one part of water with one part of rubbing alcohol.

2) Spray the mouldy areas of your leather car seats with the solution.

3) Wipe the seats down with a clean, dry rag.

4) Allow the seats to air dry completely.

5) Enjoy your clean leather car seats!

Additional Tips:

-For best results, clean your leather car seats on a sunny day, and the sunlight will help dry the seats and prevent mould from growing.

-If you don’t have to rub alcohol on hand, white vinegar can be used to substitute.

How to Remove Mold Growth from Unfinished Leather

If you want to remove mould from unfinished leather, you’ll need to be cautious about the ingredients and procedures. If your beloved leather jacket is incomplete, it’s best to use saddle soap to remove mould than to try to produce a homemade leather cleaning.

What You’ll Need:

-A clean, dry rag

-Saddle soap

Instructions:

1) Begin by gently brushing the mouldy areas of your leather with a clean, dry rag. This will help to loosen the mould and make it easier to remove.

2) Next, create a lather with the saddle soap and apply it to the mouldy areas of the leather.

3) Allow the soap to sit on the leather for a few minutes before rinsing it off with clean water.

4) Dry the leather off with a clean towel and allow it to air dry completely.

5) Once the leather is dry, apply a conditioner to help keep it soft and supple.

Additional Tips:

-Unfinished leather is more delicate than finished leather, so it’s essential to take extra care when cleaning it.

-Avoid using harsh chemicals or cleaners on unfinished leather, as these can damage the material.

-If you’re unsure whether your leather is finished or unfinished, it’s best to err on caution and use saddle soap to clean it.

Proper Use of Leather Conditioner

Leather conditioner is vital for keeping your leather goods looking their best. When used correctly, it can help restore moisture and protect your leather from damage.

However, it’s important to note that not all conditioners are created equal, and some products on the market can do more harm than good to your leather.

When choosing a leather conditioner, be sure to select one specifically designed for use on leather. Many all-purpose cleaners and conditioners contain ingredients that can damage leather, so it’s best to avoid these products.

It’s also essential to test the conditioner on a small, inconspicuous area of your leather before applying it to the entire piece. This will help you ensure that the conditioner is compatible with your leather and won’t cause any damage.

Best Tips for Cleaning Leather Shoes

Leather shoes are a wardrobe staple for many people, but they can be difficult to keep clean. Here are a few tips for cleaning leather shoes and keeping them looking their best:

1) Remove excess dirt and debris by brushing them with a soft-bristled brush.

2) Make a cleaning solution by mixing equal parts of water and vinegar.

3) Dip a clean cloth in the solution and use it to wipe down your shoes.

4) Rinse the shoes with clean water and allow them to air dry.

5) Apply a leather conditioner to help keep them soft and supple.

Additional Tips:

  • For best results, clean your leather shoes on a sunny day. The sunlight will help to dry the shoes and prevent mould from growing.
  • If you don’t have vinegar on hand, lemon juice can be used to substitute.
  • Never put leather shoes in the washing machine, as this can damage them

Can baking soda be used to remove mildew from leather?

Yes, you may use baking soda to eliminate mildew from leather. To employ this approach, prepare a paste of baking soda and water and apply it to the affected regions. Wait for a few minutes to wipe away the paste with a clean, dry cloth. You may need to repeat this method several times to eradicate the mildew. Once the mould has been removed, condition the leather to help prevent it from happening again.

Use a Soft Brush for Leather Furniture

If you have leather furniture, it’s important to know how to properly care for it. One of the best ways to keep leather surface looking its best is to regularly dust it with a soft-bristled brush followed by a clean cloth.

This will help to remove any dirt or debris that has accumulated on the leather surface. It’s also important to vacuum your leather furniture on a regular basis to remove any embedded dirt.

In addition to dusting and vacuuming, you should also clean your leather furniture with a mild soap and water solution and a damp cloth. Be sure to test the solution on a small, inconspicuous area of the leather before applying it to the entire piece.

Can baby shampoo be used to clean leather?

No, baby shampoo should not be used to clean leather. Baby shampoo is designed for sensitive skin, which means it’s gentle enough to use on a baby’s hair. However, this also means it’s not strong enough to clean leather items effectively. If you want to use a shampoo to clean your leather, opt for mild dish soap.

Final Thoughts

Mould and mildew can destroy your leather items, but you can remove these tenacious stains with elbow work. Make sure to keep your leather bags and belts in a cool, dry place to avoid mould growth in the future. Your leather goods will last for years if properly cared for so always remember to use a leather cleaner and not corrosive materials.

Your leather bag and other leather items will thank you for it!

How to Pack Frozen Food When Moving

Because of the diversity of products in your kitchen, packing frozen food for your relocation might be a challenge. Many items must be sorted out, from frozen food to perishables, before you begin packing anything. Furthermore, if you have a habit of piling stuff in your refrigerator, it could take hours to get started with the packing.

So, what is the answer? Regardless of the intricacy, you may pack your frozen food items with ease by following the step-by-step technique outlined below:

Make a list of food you’ll need to pack.

Before you begin wrapping jars and containers, make a list of the food products in your kitchen, including frozen food, and categorize them so that you can pack the goods together without damaging each other. It’ll also help you decide what to pack and leave behind.

Make sure you’re not wasting food and carrying as much frozen food as your capacity allows. Here’s how to transport frozen food and other refrigerated food when you move:

Make an inventory list.

As you go through your cupboards and fridge, write down all the food items you find. This will help you determine what needs to be used before moving and what remaining frozen food can be packed.

In the weeks leading to your move, make are to consume the ones that will go bad first and throw away any expired foods and frozen meat. Baking supplies must also be checked for bacterial growth and molds. Non perishables can also be donated to a local charity. Some of them will be happy to accept frozen items and food supply as long as they are still good for consumption.

Categorize your food items.

Once you have an inventory list, it’s time to start sorting your food into different categories:

  • Pantry items: non-perishable items such as canned items, dry goods, spices, etc.
  • Refrigerator items: perishable items such as milk, cheese, meat, produce, etc.
  • Frozen items: frozen food such as ice cream, meat, vegetables, etc.

Begin packing according to the type of food.

Because each type of food must be handled differently, we have detailed the packaging processes for each category separately.

Here’s how to prepare your food for the move:

You can keep track of the number of perishable items in your freezer by making a list of what you have and then transferring them to your new home on moving day. Be sure to pack these items in an insulated bag or a portable freezer or cooler surrounded with cold packs.

You can also place them in sealable containers in the portable freezer so they will stay frozen for a few hours as the moving company transports your belongings to your new house.

Follow These Helpful Tips When Packing Food

Pack items such as cheese, butter, and cream in plastic bags, or packing paper and seal them tightly then place them in the freezer. These items need cold temperature to stay fresh.

Wrap bacon and sausage in foil or wax paper and store in the freezer.

For fish, first, wrap it in wax paper or aluminium foil, then place it in a plastic bag before putting it in the freezer.

To keep hamburgers and other ground meat fresh, place it in a plastic bag, remove as much air as possible, seal the bag, and store it in the freezer.

Pack eggs in their carton and store them in the fridge until you’re ready to move.

Place fruit juices and milk in glass bottles or cartons with tight-fitting lids and store them in the fridge. If you have dry ice you can place them with frozen food in a freezer when moving to help keep it for longer.

Pack fruits and vegetables in plastic bags and place them in the fridge.

Non-Perishable Foods

These food items do not require refrigeration and have a long shelf life, such as canned goods, cereals, pasta, rice, etc. You can leave them in their original packing or repack them in plastic containers or cardboard boxes. Here are some suggestions for packing non-perishable foods:

Canned goods can be loaded, but make sure you label them to know what’s inside each tin.

For items such as cereals, pasta, and rice, please place them in airtight plastic containers or resealable bags. This will keep them fresh and protect them from insects and rodents.

Allergy Information

If you or anyone in your family has food allergies, it is essential to label all the packing boxes accordingly. This will help you identify the allergen-free food items and keep them separate from the others.

Packing to Transport Frozen Food

If you’re moving a short distance, you can pack most of your food in a cooler. This would be particularly useful if you’re moving in the summer when high temperatures. Here’s what you need to do:

  • Pack all the perishable items in the cooler, such as dairy products, meat, fish, eggs, etc.
  • Pack non-perishable items such as canned goods, cereals, pasta, snacks, etc., in resealable bags or airtight containers.
  • Pack the cooler with ice packs or dry ice to keep the food items chilled during the transfer.
  • Packing food in a cooler is a good option if you’re moving a short distance.

Packing Frozen Food Items for Long-Distance Trips

If you’re moving to another state or country, it is best to donate any unopened non-perishable food items to a local food bank. There is a chance that the food would spoil throughout the long travel. If you have any perishable things, you can eat them before moving or donate them to friends and family.

Transporting Food By Yourself

If you’re moving the food items yourself, make sure you pack them properly to prevent them from going wrong during the journey. Here are some pointers to remember:

  • Pack all the perishable items in an insulated bag or more relaxed.
  • Pack non-perishable items such as canned goods, cereals, pasta, snacks, etc., in resealable bags or airtight containers.
  • Pack the cooler with ice packs or dry ice to keep the food items chilled during the transfer.

Instructions to Store Frozen Food Items

On top of the suggestions above, there are a few other items to consider while packing food for a move. Here are a few essential tips:

  • Ensure you have enough packing supplies, such as boxes, bags, tape, etc., to pack all the food items.
  • Pack the food items in small batches to be moved easily.
  • Pack the food items according to their type, such as perishable items, canned goods, etc.
  • Make sure you label all the packing boxes to know what’s inside each box.

These are a few critical recommendations you need to follow while packing food for a move. Follow these guidelines to guarantee that your food is loaded accurately and safely.

What Happens When Food is Not Packed Properly?

When food is not packed correctly, it can spoil or become contaminated, leading to food poisoning or other illnesses. Each year, Australians experience an estimated 4.1 million foodborne illness cases, with hospitalizations and 78 deaths.

Packing food correctly is crucial to preventing these illnesses. Some tips for packing food safely include:

  • Keep hot food hot and cold food cold. Use insulated bags or containers to keep food at the correct temperature.
  • Wash your hands thoroughly. This is especially important before handling food eaten raw, such as fruits or vegetables.
  • Avoid cross-contamination. Keep raw meat, poultry, and seafood separate from other food. Use different cutting boards and knives for these items.
  • Pack food in airtight containers. This will keep out bacteria and other contaminants. Refrigerate perishable food. This includes food that contains raw meat, poultry, or seafood.
  • Freeze items that won’t be used right away.

How Long Does Frozen Food Keep?

Frozen food can last for months or even years if stored properly. The key to storing frozen food is to keep it at 0 degrees Fahrenheit (-18 degrees Celsius), and this will prevent the growth of bacteria and other microorganisms that can cause food poisoning.

To ensure that your frozen food stays fresh, follow these tips: Store frozen food in a freezer set to 0 degrees Fahrenheit (-18 degrees Celsius).

Hiring Professional Movers

If you’re hiring professional movers, inform them about the food items that need to be moved. This is because most moving companies have a policy of not transporting perishable goods. So, it is best to either move the food items yourself or donate them before the move.

Conclusion

Packing food for a move can be challenging, but it is essential to do it correctly to prevent food spoilage or contamination. Use the tips in this article to ensure that your food is packed perfectly and stays fresh during the move.

Fast Cleaning Tips for Busy People

Many of us appear to be time-pressed and need to find ways to complete our chores more quickly. This is undeniably true in our household cleaning routine. Fortunately, shortcuts, tools, and tactics are available to help you clean more rapidly.

Whether you have guests coming soon or just want to do some quick maintenance, these tips and methods will have your home sparkling clean in no time.

Begin with a plan

Take a few moments before you begin cleaning to consider what needs to be done. Make a list of tasks and prioritise them. This will allow you to focus on the most important things first and avoid becoming sidetracked.

Collect your supplies

Before you begin cleaning, make sure you have all the necessary supplies. Rags, cleansers, and gloves are examples of such items. You will also need some liquid detergent, soapy water, paper towels, a plastic bag, dry cloth, feather dusters, a trash can and other cleaning supplies to save time whenever you clean your house.

Having everything in one location saves time and allows you to work more efficiently and complete the speed clean task in record time.

Start from the top

When cleaning a room, begin at the top and work your way down. Any dirt or dust that falls to the ground will be cleaned up as you walk. Give it a once over after you speed clean and take note of the areas that you need to circle back to the next opportunity when you have more time cleaning.

Work in sections

Break up a large area, such as a living room or kitchen, into smaller sections when cleaning it. Concentrate on one piece at a time, then go on to the next. Cleaning blinds, for example, should be a task on its own. The same thing applies when cleaning mineral deposits out of the shower door. Working in sections allows you to concentrate on priority areas to maintain a clean house.

Wipe clean and thoroughly

When cleaning, don’t forget about the little things. Dusting photos, taking time to wipe clean light fixtures, and vacuuming under the furniture. These small details can make a big difference. Use a clean cloth, and if you need to use furniture polish, do so. Other areas will need a lightly spray of baking soda or a cleaning solution to loosen tough stains to make cleaning time faster and easier.

After cleaning, don’t forget to wipe off excess moisture in areas like the shower walls or kitchen sink to prevent mould from forming.

Use the right cleaning tools.

Cleaning with the right tools might help you clean more efficiently and save time. A cordless vacuum cleaner, for example, is significantly more straightforward to use than a standard vacuum cleaner.

A mop with an integrated wringer will also save you time when mopping floors.

Get everyone involved

Get your children involved in the cleaning process if you have any. Assign easy duties to a young family member, such as dusting or vacuuming. This will allow you to do the assignment faster and teach your children responsibility and how to keep a clean home at a young age.

Hire professional cleaners

Hire a professional if you don’t have the time or energy to clean your home. A professional cleaner will do a thorough job while saving you the time and effort of cleaning yourself.

Use these cleaning tips and tactics to get your house clean quickly and efficiently. You can have your home looking its finest in no time with a bit of forethought and work.

Team of janitors with cleaning supplies in office

Make Cleaning Time More Pleasant

The goal of speed cleaning is not to leave your place pristine, and instead, it’s all about maintaining order and cleanliness. You may fast clean anytime you get the chance, even on your busiest weeknights, but you must have a plan.

These are simple techniques that can help you stay motivated and clean in the most efficient way possible.

Use these on deep-cleaning days as well because they are time-tested.

Buy the best cleaning products.

A decent set will make all the difference when trying to clean quickly. Some brooms come with built-in dustpans, which can be pretty helpful.

Use a damp cloth

A damp microfiber cloth is excellent for swiftly cleaning up dust and dirt. They are also reusable, which means you will save money in the long term.

Keep a cleaning caddy.

A cleaning caddy is an excellent method to keep all your cleaning items in one location, and this will save you from looking for things when you need them.

Create a cleaning schedule

Having a cleaning schedule will help you remain on track and clean regularly. You may even create a checklist to track what needs to be done.

Set a timer

Set a timer if you’re easily sidetracked while cleaning. This will assist you in remaining focused and on task.

Reward yourself

After cleaning, take a few moments to relax and enjoy your freshly cleaned home. You can even indulge in a cup of coffee or a piece of cake, which will keep you motivated to stick to your cleaning schedule.

You’ll be well on your way to keeping your home clean and neat if you follow these guidelines. Simply remember to take things one step at a time and be patient. Speed cleaning will not happen overnight, but it will become easier and faster with practice.

How to Clean Your House Fast Before Guests Arrive

The best way to clean your house fast is to have a plan and set some time limits. Make a list of all the cleaning tasks that need to be done, then break them into smaller, more manageable chunks.

For example, if you have an hour to clean, you could spend 15 minutes on each of the following: dusting, cleaning the floors, cleaning the bathroom, and cleaning the kitchen.

You can add additional tasks like laundry or vacuuming if you have more time. If you have less time, you may need to focus on the most important tasks and save the rest for another day.

With guests arriving, you also need to do some additional preparation. If they have a meal with you, prepare the food in advance and set the table. If they stay overnight, make sure their bedroom is clean and tidy.

Tips for Working Mothers: Clean Your House Fast

Working mothers are some of the busiest people on the planet. There simply isn’t enough time to fit in a full-blown cleaning session between juggling a job and taking care of a home, and this leaves many mothers feeling overwhelmed and stressed out.

For busy Moms, learning how to clean the house quickly and efficiently is a valuable skill. Use these tips to make cleaning less of a chore and more an opportunity to spend quality time with your family.

Set a schedule and stick to it

One of the best ways to keep your home clean is to set a cleaning schedule and stick to it. Determine which days of the week you will have time to clean and make sure you put it in your calendar. If possible, try to get the whole family involved in cleaning so that it doesn’t all fall on your shoulders.

Invest in a good vacuum cleaner

If you have carpeting in your home, a good vacuum cleaner is necessary. It will help keep your carpets clean, but it will also make cleaning much easier. Look for a vacuum that is easy to use and has good suction power.

Don’t forget to dust

Dust collects on surfaces very quickly, so it’s important to make sure you dust regularly. A good way to keep on top of dusting is to do it every time you vacuum, and this will help ensure that all surfaces are kept clean and free of dust.

Keep cleaning supplies in each room.

It can be frustrating to go from room to room looking for cleaning supplies. Keep a small supply of cleaning products in each room to make things easier. This way, you will always have what you need on hand and won’t have to waste time searching for it.

Use natural cleaners

When possible, try to use natural cleaners instead of harsh chemicals. This is better for the environment, but it is also better for your family’s health. There are many great recipes for natural cleaners online that you can easily make at home.

Cleaning tools cart wait for cleaning.Bucket and set of cleaning equipment in the office. janitor service janitorial for your place. Concept of service, worker and equipment for cleaner and health

When Do You Need Professional Cleaners?

You can keep your home clean on your own most of the time, but there are certain situations when it is best to hire professional cleaners. If you are moving into a new home, you will want to make sure it is thoroughly cleaned before you start unpacking.

Professional cleaners can also be helpful if you are having a large party or event at your home. They can come in beforehand and make sure everything is sparkling clean so that you can focus on enjoying your guests.

Finally, if you simply don’t have the time to keep your home as clean as possible, professional cleaners can help take some of the burdens off your shoulders.

Hiring professional cleaners is a personal decision, and there is no right or wrong answer. Ultimately, you will need to decide what is best for your situation.

How to Pack for Moving

Moving can be one of those challenges that almost everyone must face, such as travelling a long distance through a dull landscape. It isn’t always pleasant, and it isn’t always enjoyable, but it almost always yields a positive result. Of course, the key to ensuring that the move goes as smoothly as possible is to be prepared. And being prepared starts with packing correctly.

How to pack for moving entails having all of the necessary equipment and materials on hand and taking enough time to properly pack each item with bubble wrap and moving boxes to arrive in one piece at the new location.

Packing for a move may be a daunting chore, but it does not have to be with some planning, the right packing materials, and helpful packing tips.

Here are Some Packing Tips From the Pros:

Get organised

Create a list of everything you need to pack and organise it. This will assist you in packing more efficiently and staying organised during the move. Suppose you need to stock up on a few boxes, packing materials, bubble wrap, packing tape, wardrobe boxes, toilet paper rolls, garbage bags, etc. Do it early so you can also find the best deals and buy packing moving boxes in bulk if need be.

Begin early.

Packing must not be left until the last minute. Begin many weeks in advance so and take your time and pack appropriately. You can stack your packed boxes, and kids toy boxes in one corner of the room as you start packing. Knowing how many boxes you have will also make it a bit easier to ask for a quote from a moving company. This is one of the packing tips for moving house.

Make use of high-quality materials.

Use high-quality materials like bubble wrap and cardboard boxes while packing your belongings. Buy the right-sized boxes and packing tape. Set aside wrapping materials such as plastic wrap and zip lock backs to pack dishes and lighter items. This will help to ensure that your possessions are safe in transit while moving house.

Start with the heaviest stuff.

Pack the heaviest goods near the bottom of your boxes. This makes them easier to transport and keeps them from injuring lighter goods.

Clearly label everything.

Each box should be labelled with its contents and the place it belongs, and this will make unpacking much more accessible and keep track of your belongings during the transfer.

Safeguard your valuables.

Pack your most expensive possessions individually and transport them with you during the transfer. This will keep them from being misplaced or damaged during the migration.

Employ a professional.

If the notion of packing and relocating overwhelms you, consider hiring a professional moving company. They can handle all of the details, making your move much more manageable.

Give yourself plenty of time.

Packing and moving can be stressful, so take your time and try not to do everything all at once. You can make the procedure smoother and less stressful by following these suggestions.

Make a strategy for unpacking.

Once you arrive at your new house, take some time to plan out where everything will go. This will make unpacking much more accessible and will assist you in avoiding clutter in your new house.

Have fun in your new home!

After packing and transferring, take some time to relax and enjoy your new home after hard work. Applaud yourself on you’ve done an excellent job, and start making memories in your new home.

Packing is to be a stressful one. By following these packing tips, you may make the procedure easier and less after all of the hard work. With some forethought and careful packing, you may arrive at your new house ready to begin living your new life.

Couple moving home packing belongings in a cardboard box sitting on the floor of the living room

Use the Best Moving Boxes, Packing Supplies When You Pack Boxes for Moving

It is very important that you use the best quality moving boxes and packing supplies when packing for a move. Cheap or flimsy materials will not protect your belongings during the move and could cost you more in the long run.

Get your moving boxes from a reputable source.

Your local hardware store or home improvement centre is good to start. You can also find good-quality moving boxes online from websites that sell moving supplies.

Choose the right size box for your belongings.

You don’t want to cram everything into one big box – that will make it too heavy to lift and could damage your things. Conversely, you don’t want to use too many small boxes, as that will make the packing process take longer.

Label your boxes

As you pack each box, label it with the contents and the room it is going in. This will save you a lot of time and hassle when unpacking at your new home.

Use packing paper or bubble wrap.

Packing paper or bubble wrap will protect your belongings from being damaged in transit. Make sure to pack delicate items carefully, so they don’t get broken.

Use strong tape

You want to use good-quality, strong tape to seal up your boxes, which will keep them closed and prevent your things from falling out during the move.

Packing Tips to Avoid Costly Mistakes:

Avoid procrastination.

Among the most common errors individuals make while packing for a move is leaving it until the last possible moment. This will increase your anxiety and make loading more difficult.

Avoid overpacking.

Packing too many boxes might be daunting and complicate the moving process. Pack only what you need and leave unneeded items at home.

Do not load fragile objects incorrectly.

Use plenty of bubble wrap or padding to safeguard fragile things when packing them. Pack them carefully and clearly label them so they don’t get misplaced or destroyed during the relocation. Some even use zip lock bags and paper plates or wrap fragile items in toilet paper before loading them unto packing boxes. Do what you think is best, you can never be too careful with your precious items.

Don’t overlook the necessities.

It is critical to mind the conditions when packing for relocation. Pack a change of clothes, toiletries, and any other goods you may require when you arrive at your new home.

Don’t ignore your pets.

If you have pets, plan for their care throughout the transfer, and this could entail hiring a pet sitter or finding them a temporary home.

Avoid attempting to accomplish everything yourself.

Packing and relocating can be stressful, so don’t try to handle it all independently. Enlist the assistance of friends and family, or contact a professional moving company to take the details for you.

Don’t forget to update your contact information.

Make sure to update your contact information with friends and relatives and change your address with the post office. This ensures that you continue to receive mail and packages even after you relocate.

Remember to take a rest.

Packing and relocating can be stressful, so take your time. Take frequent pauses, and be sure to get plenty of rest.

Don’t leave packing until the last minute.

Begin packing early and gradually fill over time. It will save time, and you can pack more attentively.

Remember to have fun.

Although packing and relocating might be stressful, it is critical to enjoy the process. After all, you’re relocating to a new location and beginning a new chapter in your life. Accept the change and look forward to the journey!

Packing for relocation does not have to be stressful, and you can make the procedure considerably more manageable and less chaotic if you avoid these frequent blunders. With some forethought and careful packing, you may arrive at your new house ready to begin living your new life.

Conclusion

So, whether you’re a first-time homeowner or a business owner looking to transfer your workplace, utilise this approach to make packing as stress-free as possible. Don’t be hesitant to call in reinforcements if you ever feel overwhelmed!

Professional movers can alleviate the stress of relocating and ensure that your belongings arrive securely at your new home. Are you ready to get started?

How to Keep Your Move Within Your Budget

When most people think about moving, the first thing that comes to mind is the expense. And it’s no wonder: according to a study by Home Advisor, the average cost of moving ranges from $1,170 to $5,630, depending on the size of your home and how far you’re moving.

But there are ways to keep your moving budget manageable and save money here and there. Here are a few tips and sound financial advice that can help you:

Get an Estimate from Moving Companies

You can get free quotes from different professional moving companies to give you an accurate estimate of your moving expenses. Be sure to get quotes from at least three other companies to get a good idea of the average cost of your move.

You can also use an online moving cost calculator to estimate how much it costs to move based on the size of your property, the distance travelled, and the services you require. This way you can look for effective ways to save money and forego things that are not really necessary parts of your moving costs.

Have an Emergency Fund Ready

After paying off the utility companies, you need to set aside funds for the move and for starting life at a new address. Moving is no easy task and even if you are only moving a short distance, you may need to prepare some extra money for incidental costs.

While you can always find the best way to save money, such as asking the moving team for a flat rate, or checking with your tax advisor to see if the move is tax-deductible or can be covered by a tax deduction, having money on hand can prepare you for unexpected occurences.

Purge Your Home of Unwanted Items

The best way to reduce your moving expenses is to drive fewer goods in the first place. Sort through your stuff and discard anything you no longer use or require. Unwanted objects might be sold, donated to charity, or given to friends and family members.

The fewer items you have to transport, the small your moving budget will become. Additionally, you can save money and help other people in the process.

Use Free Boxes and Packing Materials

Packing your boxes is one of the simplest ways to save money when moving house. If you pack and sort your belongings, you won’t have to pay the moving company to do it for you.

You can cut a big chunk off your moving budget by using free packing supplies and packing material as well as moving boxes.

Free cardboard boxes can be found at local grocery stores, liquor stores, and office supply companies. You can ask your family and friends if they have any extra boxes, and some moving companies also offer used boxes when you book with them. You can also scrounge around for used bubble wrapping to protect fragile objects especially if you’re moving interstate to a new house.

Move During the Off-Season

For people who are moving on a budget, the cheapest time to move is when fewer people are moving during the winter months. Moving companies tend to be less busy during this time, and they may offer discounts to entice customers who are moving on a budget or moving house even on a bad financial situation.

If you’re flexible with your moving date, try to schedule your move for a date in January, February, or March. These are typically the cheapest months to move. You only need to plan ahead and manage both everyday expenses and your moving budget so you have enough for hiring movers or a storage company.

Hire a Portable Storage Container

If you’re looking for an affordable way to move your belongings, consider hiring a portable storage container. This is a great option if you’re moving long-distance or don’t have much time to pack. With a portable storage container from reputable storage companies, you can pack and load your belongings at your own pace, and the storage container will then be transported to your new home.

This is a great option if you’re looking for an affordable way to move your belongings. You can pack and load your belongings on your own schedule. You will also save space because you’ll only bring the flat pack furniture and other belongings that will fit inside the container.

Get Help from Friends and Family

If you have friends or family willing to assist you with your move, accept their offer! This will save you money, but it will also provide you with additional assistance at what may be a difficult time. Planning ahead with friends and relatives can help you save time, and other expenses like a rental truck. If you can get a few friends with vehicles to help you move smaller items like your clothes, you can reserve the bigger furniture for the professional movers and truck rental.

Hire Professionals

Consider hiring professional movers if you don’t have anyone to assist you. Although this will cost you more money, having peace of mind knowing your valuables are in good hands may be worth it. Professionals will know how to properly pack your belongings and will have the experience and equipment to safely transport them.

You can also look for moving companies that offer discounts or coupons and make sure that there are no hidden costs or charges that will upset your moving budget and put you in an even worse financial situation.

Be Organised and Prepared

Being prepared and organised for your move will make it less stressful. This will also assist you in avoiding additional expenses from your moving company at the last minute. Ensure you have a comprehensive inventory of everything you need to move and that all of your boxes are correctly labelled.

If possible, try to disassemble any furniture that can be taken apart and put back together at your new home. This will make a move more accessible and help avoid damage. You can also pack breakable items in bubble wrap. Some

Convert Unwanted Items into Cash

You may have a lot of goods that you no longer need or want now that you’ve decluttered your home. You, like most others, undoubtedly wish to get rid of them as soon as possible. But, before you do so, examine whether they have any worth.

You may be able to convert your unwanted items into cash by selling them online, at a garage sale, or at a consignment shop. This will help you offset the cost of your move, but it will also help you declutter your new home.

Use Coupons and Discounts

When you’re planning a move, be sure to look for coupons and discounts to help you save money. You may be able to find deals on moving supplies, storage units, and even moving companies. Compare prices if you’re on a tight budget. Moving during off peak season is the cheapest way to go.

You should also ask your friends and family members if they know of any businesses that offer discounts to people who are moving.

Save Money with Professional Movers

You can typically obtain a better rate when you book your relocation ahead of time. Customers who arrange their moves at least a month in advance usually receive a discount from the moving company.

If you’re flexible with your moving date, try to schedule your move for a time when the demand is low. This will usually be during the week, and you may be able to get a discount if you move on a Monday or Tuesday.

Hiring professionals is one of the best moving tips to follow because most moving companies can create a moving budget for you with no additional costs. It’s an ideal situation that gives you breathing room in terms of packing, lifting, unloading, and unpacking your items. If you find a great moving team, you will have found the cheapest way to move to a new house or new space.

Avoid Hidden Costs

When you’re getting quotes from moving firms, ask about hidden fees. Some companies may charge for additional services, such as packing and unpacking your belongings, storage, and insurance.

You should also be aware of the different fees and extra costs associated with a move. These include fuel surcharges, environmental costs, and even pet fees. Make careful to inquire about these before signing a contract with a moving company.

Couple moving home packing belongings in a cardboard box sitting on the floor of the living room

Conclusion

Saving money on your move doesn’t have to be difficult. You can keep your relocation costs low and avoid hidden fees by following these tips and create a moving budget from the get-go.

By being prepared and organized, you can make your move less stressful and more affordable. Moving to a new place to start a new job or business is never easy, but by carefully planning and organising, you can make your relocation a lot cheaper and easier on your moving budget.

Best Places in Brisbane

Brisbane has many exciting sites to visit and discover. This lovely city has something for everyone, from world-famous beaches and themed gardens to lush jungles. You will find delicious food, including street food and fine dining places within walking distance of Central Park, Queen Street, and Kangaroo Point.

Enjoy the best of what life has to offer when you visit Brisbane!

Top Locations to Visit in the Brisbane River Area:

1. The Beach: Brisbane’s warm climate and lovely beaches make it the ideal place to unwind and soak up the rays. Surfers will adore the Gold Coast’s surf, while swimmers appreciate Moreton Bay’s calm waters and the charm of Streets Beach.

2. The Rainforest: Brisbane is home to one of the world’s largest rainforests, making it an ideal destination for environment enthusiasts. There are numerous hiking and bike paths to explore and waterfalls and wildlife.

3. The City: Brisbane is a thriving metropolis with many things to see and do. The city has something for everyone, from shopping and restaurants to art galleries and museums.

4. The Outback: The Australian Outback is only a short drive from Brisbane, where you may enjoy the true grandeur of the country. In the Outback, there are several chances for camping, trekking, and 4WDing.

5. The Islands: Moreton Island, North Stradbroke Island, and Fraser Island are all beautiful islands surrounding the Brisbane River. These islands provide several chances for swimming, fishing, and beach relaxation.

The Brisbane river area has something for everyone, whether you’re looking to relax or explore.

When Is the Best Time to Travel to Brisbane?

The months of March to May, or September to November, are ideal for a visit to the Brisbane river area, and these months are perfect for outdoor activities, special events, and festivals.

If you want to escape crowds, the shoulder seasons of April-May and October-November are the best times to visit South Brisbane and Brisbane City. Visit Kangaroo Point Cliffs, Adelaide St, Eat Street Northshore, Fortitude Valley, and the Inner City to taste Brisbane’s history and experience the river city centre.

What Are Brisbane’s Must-See Attractions?

Some of Brisbane’s must-see attractions include nature spots like Brisbane City Botanic Gardens, the Lone Pine Koala Sanctuary, Moreton Bay, South bank Parklands, Roma Street Parkland, Kangaroo Point Cliffs and modern structures like the Brisbane City Hall, Brisbane Powerhouse, Cultural Centre, Northshore hamilton ferry terminal, riverside walkways, street markets, river cruise, cultural events, temporary exhibitions, and other tourist attractions like the city skyline.

National Park of the Glass House Mountains

Glass House Mountains is a picturesque landscape comprised of thirteen volcanic hills rising from Queensland’s coastal plains and home to a rich range of natural flora and animals. Tibrogargan and Ngungun mountains are two of Brisbane’s most popular bushwalking and mountaineering destinations. In 2006, it was added to Australia’s National Heritage List. The Glass House Mountains National Park is around 60 kilometres north of Brisbane. Be sure to see this place when you visit Brisbane,

Queensland Art Gallery

The gallery of modern art is the most extensive gallery of modern and contemporary art in Australia. The gallery is located in the Brisbane CBD and houses a collection of more than 17,000 works of art. The gallery is a significant cultural destination for locals and tourists alike and plays an important role in the city’s arts scene.

The Gallery of Modern Art was established in 1895 and has since undergone a number of expansions and renovations. The Queensland Art Gallery is open daily from 10 am to 5 pm, and admission is free for all visitors. It is a favourite of art lovers, and it holds free events almost around every year.

Mount Coot-tha Lookout

Mt Coot-tha provides one of Brisbane’s most spectacular panoramic views and its surroundings. Moreton Bay can be seen on a clear day. The overlook lies at Mt Coot-tha, a short car or bus ride from the city centre.

The Koala Sanctuary at Lone Pine

Over 130 koalas and other Australian creatures, including kangaroos, wallabies, echidnas, and reptiles, live at Lone Pine Koala Sanctuary. The refuge provides a one-of-a-kind opportunity to hold a koala and daily displays and feeding times. Lone Pine is only a short drive from the city centre.

Climbing the Story Bridge Adventure

The Story Bridge Adventure Climb is not missed for those searching for a thrill. This guided climb takes you to the top of Brisbane’s Story Bridge, where you’ll be treated to breathtaking views of the city and its surroundings. The promotion is appropriate for people of all fitness levels and is an excellent activity for families and groups.

Museum of Queensland

Anyone interested in Australian history and culture should visit the Queensland Museum. The museum houses an extensive collection of Aboriginal artifacts and exhibits on Queensland’s natural history, dinosaurs, and maritime history. The Queensland Museum is located in the heart of Brisbane’s business sector.

Botanic Gardens of the City

The Brisbane City Botanic Gardens is a beautiful sanctuary in the city centre, ideal for relaxing and getting away from the hustle and bustle. The Brisbane botanic gardens feature a variety of native plants and flowers, a bonsai collection, and an Australian rainforest. The Brisbane Botanic Gardens are located in Brisbane’s central business district and are within walking distance to the city centre, where you can enjoy Asian cuisine and more!

The Story Bridge

The Story Bridge connects three Brisbane attractions – the Brisbane River, Kangaroo Point, and Fortitude Valley – and Australia’s most iconic bridge. The bridge was one of just two in Australia that can be climbed, and the pinnacle gives stunning 360-degree views of the city.

Brisbane’s Wheel

This transportable Bussink Ferris wheel in Brisbane is a 60-meter-tall wheel that provides a 360-degree panorama of the city below. The journey lasts 12 minutes, and each capsule in the rotation is air-conditioned. The wheel comes to a standstill when it hits the top of each cycle, and an audio clip identifying the most incredible places to visit in Brisbane is played.

New Farm Park

The New Farm Park is located in the heart of the Brisbane CBD, on the banks of the Brisbane River. The park is home to a variety of trees, shrubs and flowers, as well as a number of sculptures. The park is a popular spot for picnics, wedding photos and general relaxation in the Brisbane region.

The Queensland Gallery of Modern Art is located adjacent to the New Farm Park. The gallery is home to a variety of artworks, both Australian and international. The modern art gallery also hosts a number of events and exhibitions throughout the year.

What Are the Best Brisbane Day Trips?

There are plenty of good day trips available from South Brisbane. Among the best are:

1. Moreton Island (Queensland): Moreton Island, a short boat journey from Brisbane, is a popular destination for swimming, snorkelling, fishing, and resting on the beach.

2. North Stradbroke Island: Another fantastic option for a day trip from Brisbane is North Stradbroke Island. Swimming, surfing, and exploring the natural environment are all popular activities on the island.

3. Noosa Heads: Just a short drive from Brisbane City, Noosa Heads is a popular tourist location. The town is well-known for its lovely beaches, restaurants, and shops.

4. Sunshine Coast: One of Brisbane’s most popular day trip locations on the Sunshine Coast. Many beaches and attractions, such as Australia Zoo and Sea Life Sunshine Coast, may be found.

5. The Gold Coast: The Gold Coast is well-known for its theme parks, beaches, and nightlife, and Brisbane is simply a short drive away from the Gold Coast.

What Is the Most Convenient Way to Get Around Brisbane?

Taking public transportation is the most excellent method to move about Brisbane City. The city boasts an extensive bus network and a train network covering most of the town. You can also rent a car or use a taxi when in Brisbane’s CBD. However, parking in the city center can be difficult.

Cycling is another excellent way to travel about Brisbane. There are numerous designated bike paths, and the weather is pleasant for cycling all year.

Why Live in South Bank?

South Bank is an inner-city suburb of Brisbane, Queensland, Australia, and is located 2 kilometres (1.2 mi) south of the Brisbane CBD. South Bank was settled in 1843 and is today home to several major arts and cultural venues, including the Queensland Art Gallery, Museum of Brisbane, Queensland Performing Arts Centre and the State Library of Queensland. Its name comes from the fact that it is located on the southern bank of the Brisbane River.

South Bank was formerly uninhabited marshland composed of mangroves and sub-tropical rainforest. The South Bank area was first settled by Europeans in 1843 when the land was sold to Peter McLean, Archibald Clow and Allan Cunningham (the botanist). The first hotel in South Bank, the Plantation Hotel, was built in 1849. Major floods were experienced in 1893 and 1974.

Visit Brisbane’s CBD and Other Tourist Attractions

Brisbane is ideal for either a city break or a beach vacation. Brisbane will gratify everyone in the family with its sunny weather, calm vibe, and abundance of things to see and do. So, what are you holding out for? Make your reservation for a vacation to Brisbane right away!

Best Places to Live in Melbourne

Are you considering a move to Melbourne? If so, you’re in luck – this city has a lot to offer! There’s something for everyone here, from its vibrant culture and diverse neighbourhoods to its eclectic mix of restaurants and bars. So what are the best places to live in Melbourne: is it the central business district or city centre where you can enjoy the best of city life? Or would you rather settle down on a seaside suburb, country town, or family friendly suburb that’s still within access to public transport like train stations but teeming with local parks and the best suburbs? The choice is yours.

Consider these lifestyle suburbs and other recommendations for the best suburbs to live in.

St Kilda

Situated just south of the CBD, St Kilda is one of Melbourne’s most popular beachside suburbs. With its sandy beaches, relaxed vibe and array of bars, restaurants and cafes, it’s easy to see why. St Kilda is also home to some of Melbourne’s best street art and is an excellent place to people watch if you want to live the height of young professional living. St Kilda boasts close proximity to where the action is like live music, the best coffee and a laid back lifestyle by St Kilda Beach.

Albert Park

Albert Park is your place if you’re looking for a trendy neighbourhood with a village feel. This inner-city suburb is home to a diverse mix of people and has a range of bars, cafes and restaurants to suit all tastes. It’s also only a short tram ride from the city centre, making it an ideal choice for people who want to be close to the action.

Port Melbourne

Port Melbourne is one of the best places to live in Melbourne for several reasons:

  1. It is a highly livable city with a varied and exciting mix of people, cultures, and lifestyles. Port Melbourne has a lot to offer in terms of activities, and the city has a rich history and culture.
  2. Port Melbourne is home to some excellent schools and universities, making it an ideal place to live for families and students alike.
  3. The city has a great climate, with warm summers and mild winters.

Overall, Port Melbourne is an excellent choice for anyone looking for a great place to live in Melbourne.

South Melbourne

Situated just south of the Melbourne CBD, South Melbourne is one of the city’s most desirable places to live. With its tree-lined streets, heritage buildings and proximity to some of Melbourne’s best shopping and dining, it’s no wonder South Melbourne is a popular choice for those looking for an inner-city lifestyle. One thing that makes South Melbourne so liveable is its village-like atmosphere. There are plenty of cafes, restaurants and shops to explore, and parks and green spaces to relax in. And with the CBD just a short tram ride away, you’ll never be far from the action.

Seaholme

If you’re seeking the best places to live in Melbourne, Seaholme is a must-see. This lovely coastal area is ideal for families and professionals alike, with a laid-back atmosphere and various amenities to keep you interested. Seaholme, with its train station and easy access to the city, is an ideal spot to call home.

Spotswood

This little neighbourhood, around 10 kilometres from Melbourne’s CBD, is an ideal alternative for anyone who wants to be close to town but not in the midst of it. Spotswood has a variety of cafes, restaurants, and shops, and it is adjacent to parks and reserves, making it ideal for nature enthusiasts or families with young children. The area also includes a train station, making it simple to go into the city for work or recreation.

Williamstown

Williamstown is one of Melbourne’s best places to live for many reasons. For starters, it is only walking distance from Melbourne’s CBD, making it an ideal location for those that need to be close to the city but not dwell in its heart. Second, Williamstown boasts a variety of excellent public schools, making it a perfect choice for families. Finally, the area offers a strong sense of community and a wide range of activities for young professionals or starting families.

Elwood

Elwood is one of the most popular suburbs in Melbourne, and it’s easy to see why. This beachside suburb has something for everyone, whether you’re looking for a relaxed lifestyle by the sea or a more active lifestyle with plenty of activities and attractions nearby. There are plenty of parks and reserves in Elwood and many shops and restaurants. The beach is also a short walk away, giving it an ideal location for exploring Melbourne.

Yarraville

One of the best places to live in Melbourne is Yarraville. This suburb is located just a few kilometres west of the Melbourne Central Business District and offers residents a relaxed, village-like atmosphere. There are plenty of cafes, shops and restaurants lining the main street, and parks and playgrounds nearby for families. The Yarraville Club is a well-known local landmark and offers residents a place to socialise and relax. Yarraville’s housing options include modern apartments, townhouses, converted warehouses, high rise apartments and detached homes, making it an excellent suburb for different lifestyles. It is also one of the more affordable suburbs with a reasonable median house price and inner city living.

Richmond

Richmond is one of Melbourne’s most incredible places to live if you want to live in a peaceful and comfortable inner city life. The community is vital in the suburb, including several good educational institutions, parks, and recreation facilities. There is also a decent assortment of shops and restaurants, making it an excellent choice for families and professionals. This is one of the best suburbs to live in because of its open spaces and trendy areas.

Choosing the Best Places to Live in the Melbourne City Centre

When choosing the best places to settle down in Melbourne, there are a few things you need to take into account:

  1. Consider your lifestyle and what kind of environment you’re looking for. Do you want to be close to the city where everything is walking distance, or do you prefer a more relaxed suburban lifestyle?
  2. Think about your budget. Look at the median house price in different spots like South Yarra, Albert Park, St Kilda West, Port Phillip Bay, Bayside suburb, the Yarra River area, Brunswick Street, or South West Melbourne and see what kind of housing you can afford.
  3. Consider your needs and what kind of amenities and facilities you require. Do you need public transport, pools, libraries, a clubhouse and palatial mansions you can only find in expensive suburbs? Or, do you want a village vibe with Victorian architecture houses in the inner city suburbs?

By taking all of these things into account, you’ll be sure to find the perfect place to call home in Melbourne.

There’s no doubt that Melbourne is one of the best places to live. With its lavish lifestyle, excellent schools and a fantastic range of housing options, there’s something for everyone in this vibrant city. So whether you’re looking for a relaxed suburban lifestyle or a more active and exciting city lifestyle, check out Melbourne’s best places to live. You won’t be disappointed!